Cooking

Soybean Sprout Soup/콩나물국

The last time I spent any amount of time with my grandmother was almost thirty years ago, the summer I turned sixteen and also vowed never to go back to Korea. The last time I saw her was in about ten years later, a few weeks before she passed away. My mom called to say that I should plan on coming to Korea for spring break because 할머니 (halmoni/grandmother) was not doing well.

I remember she was tall (I never got to be as tall as her) and a woman of few words. Widowed early, she raised her children on her own and then many of her grandchildren. I was her first grandchild and because my parents both worked in a different city, my grandmother raised me from the moment I was weaned until my brother was born. According to my mom, when she was pregnant with me, 할머니 ordered him to do all the household chores (cleaning, laundry, dishes, whatever required physical labor). This was unheard of in the seventies in Korea, especially coming from the 시어머니 (mother in law), since the stereotype is one who treats the daughter in law like an indentured servant as the elder of the household. I guess 할머니 was the first person I met who gave the middle finger to gender norms. My dad still does those chores, by the way.

I only have snippets of memories about 할머니, because we really didn’t do much together. After the entire family moved to Ghana when I was five, summer vacations in Korea were always filled with either being shuttled from activity to activity or playing in her house with the cousins. I remember things like her taking me to the Buddhist temple and having lunch when I was very littel, and complaining while scrubbing my back raw and washing my hair, and sitting on the stoop with her skirt hiked up over her knees on a hot July day while the neighborhood grandmothers watched over the kids, and calling for us to wash our hands and eat.

콩나물국 is the food that I associate most closely with 할머니. It’s a ubiquitous soup on a Korean table that is quick and requires only a few ingredients to make: soybean sprouts, dashima, dried anchovies, salt, scallions, garlic, and water. Also, it is difficult to find in restaurants probably for its sheer simplicity and cheapness. It’s the only thing I ever remember asking 할머니 to make for me. I remember her chuckling that of all the things I asked for, it was 콩나물국. In markets in Korea, it is common to see buckets or basins piled high with soybean sprouts. It is also one of the cheapest things you can buy in bulk for multiple dishes. In Ghana, the second bathroom was off limits while the shower head was left dripping water onto a sieve for several days until the beans sprouted. Usually, whatever we harvested will be gone in a meal or two. For me, it was a real treat.

Simple as it is, until recently, I never attempted making 콩나물국. There are two reasons.

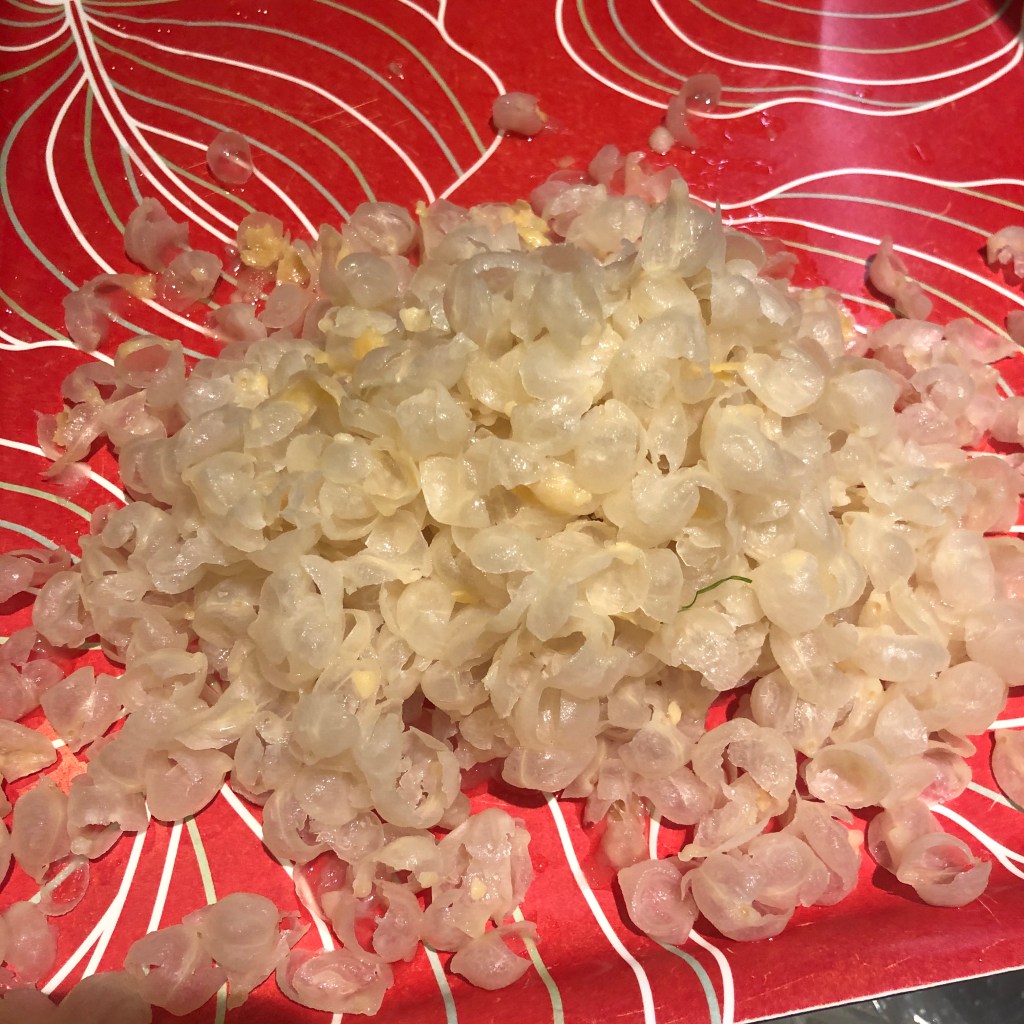
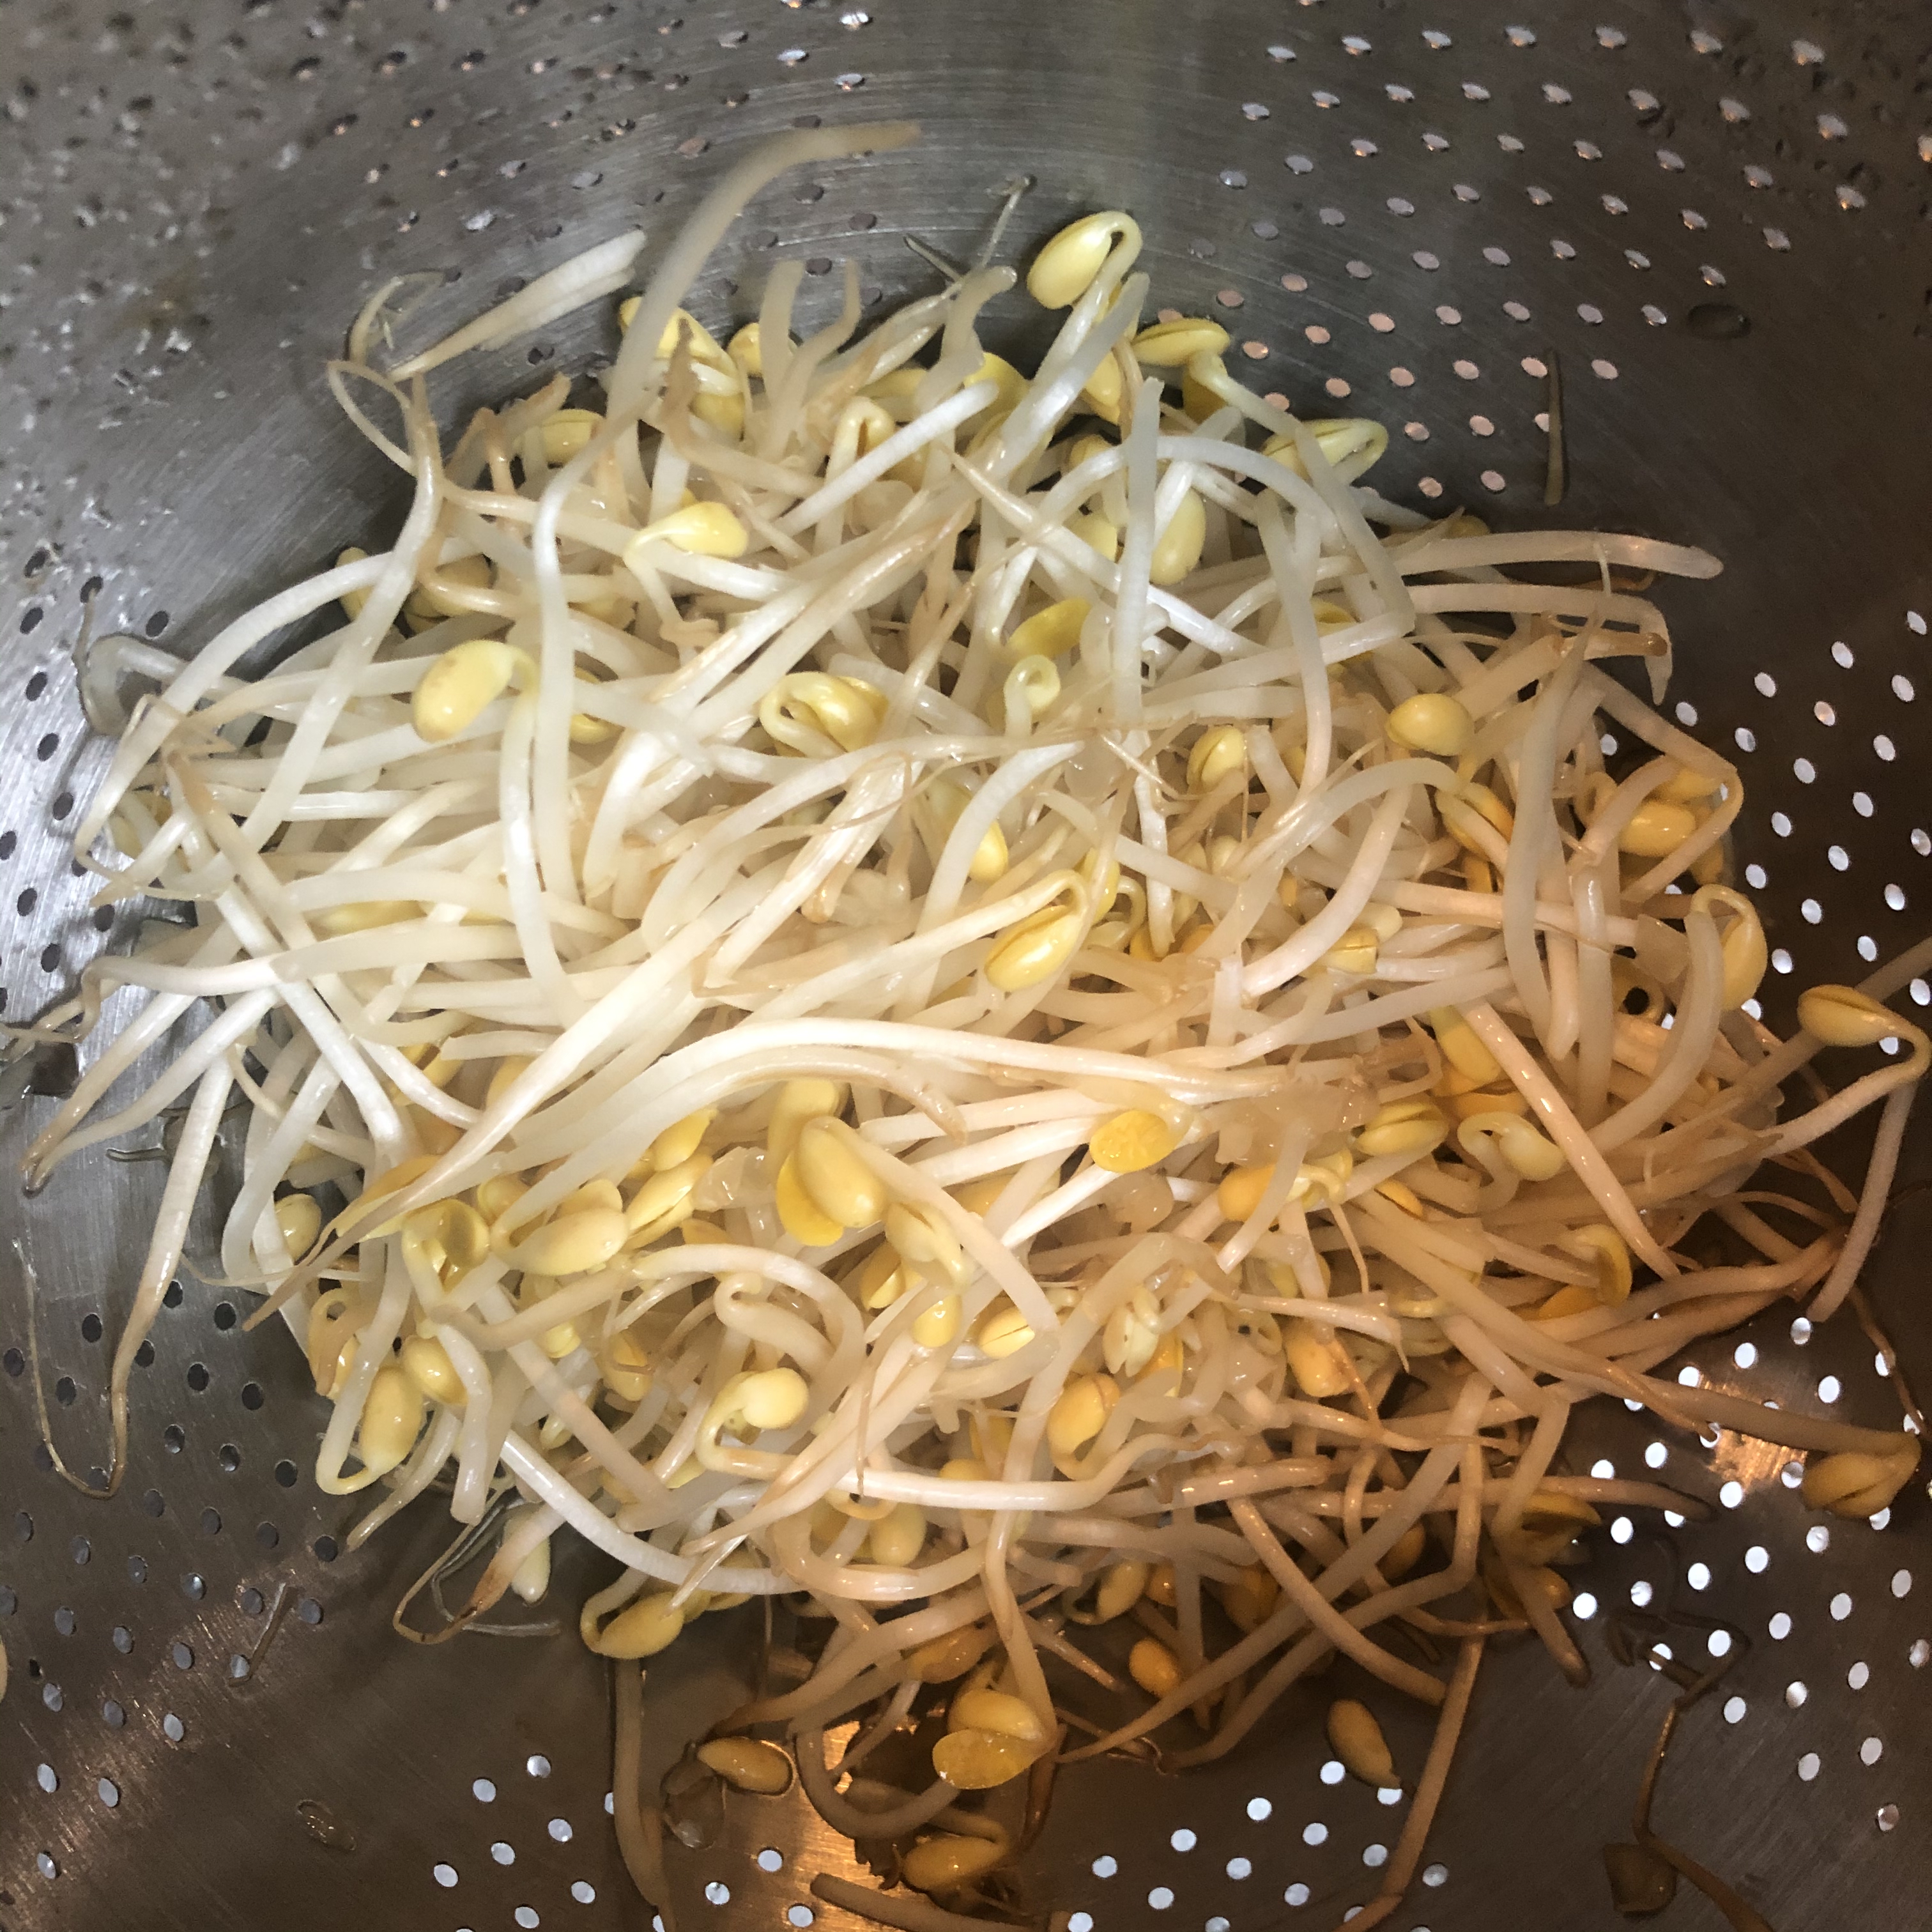
First of all, it’s surprisingly difficult to find soybean sprouts unless you have access to a Korean market. Even then, you can often end up with mung bean sprouts instead. The way you can tell that it is soybean sprout is the bright, hard, yellow split bean attached to the end. If it looks peaked and leafy, it’s probably mung bean sprouts. (See below: Mung bean sprouts on the left, soybean sprouts on the right. Both blanched and mixed in sauce.)

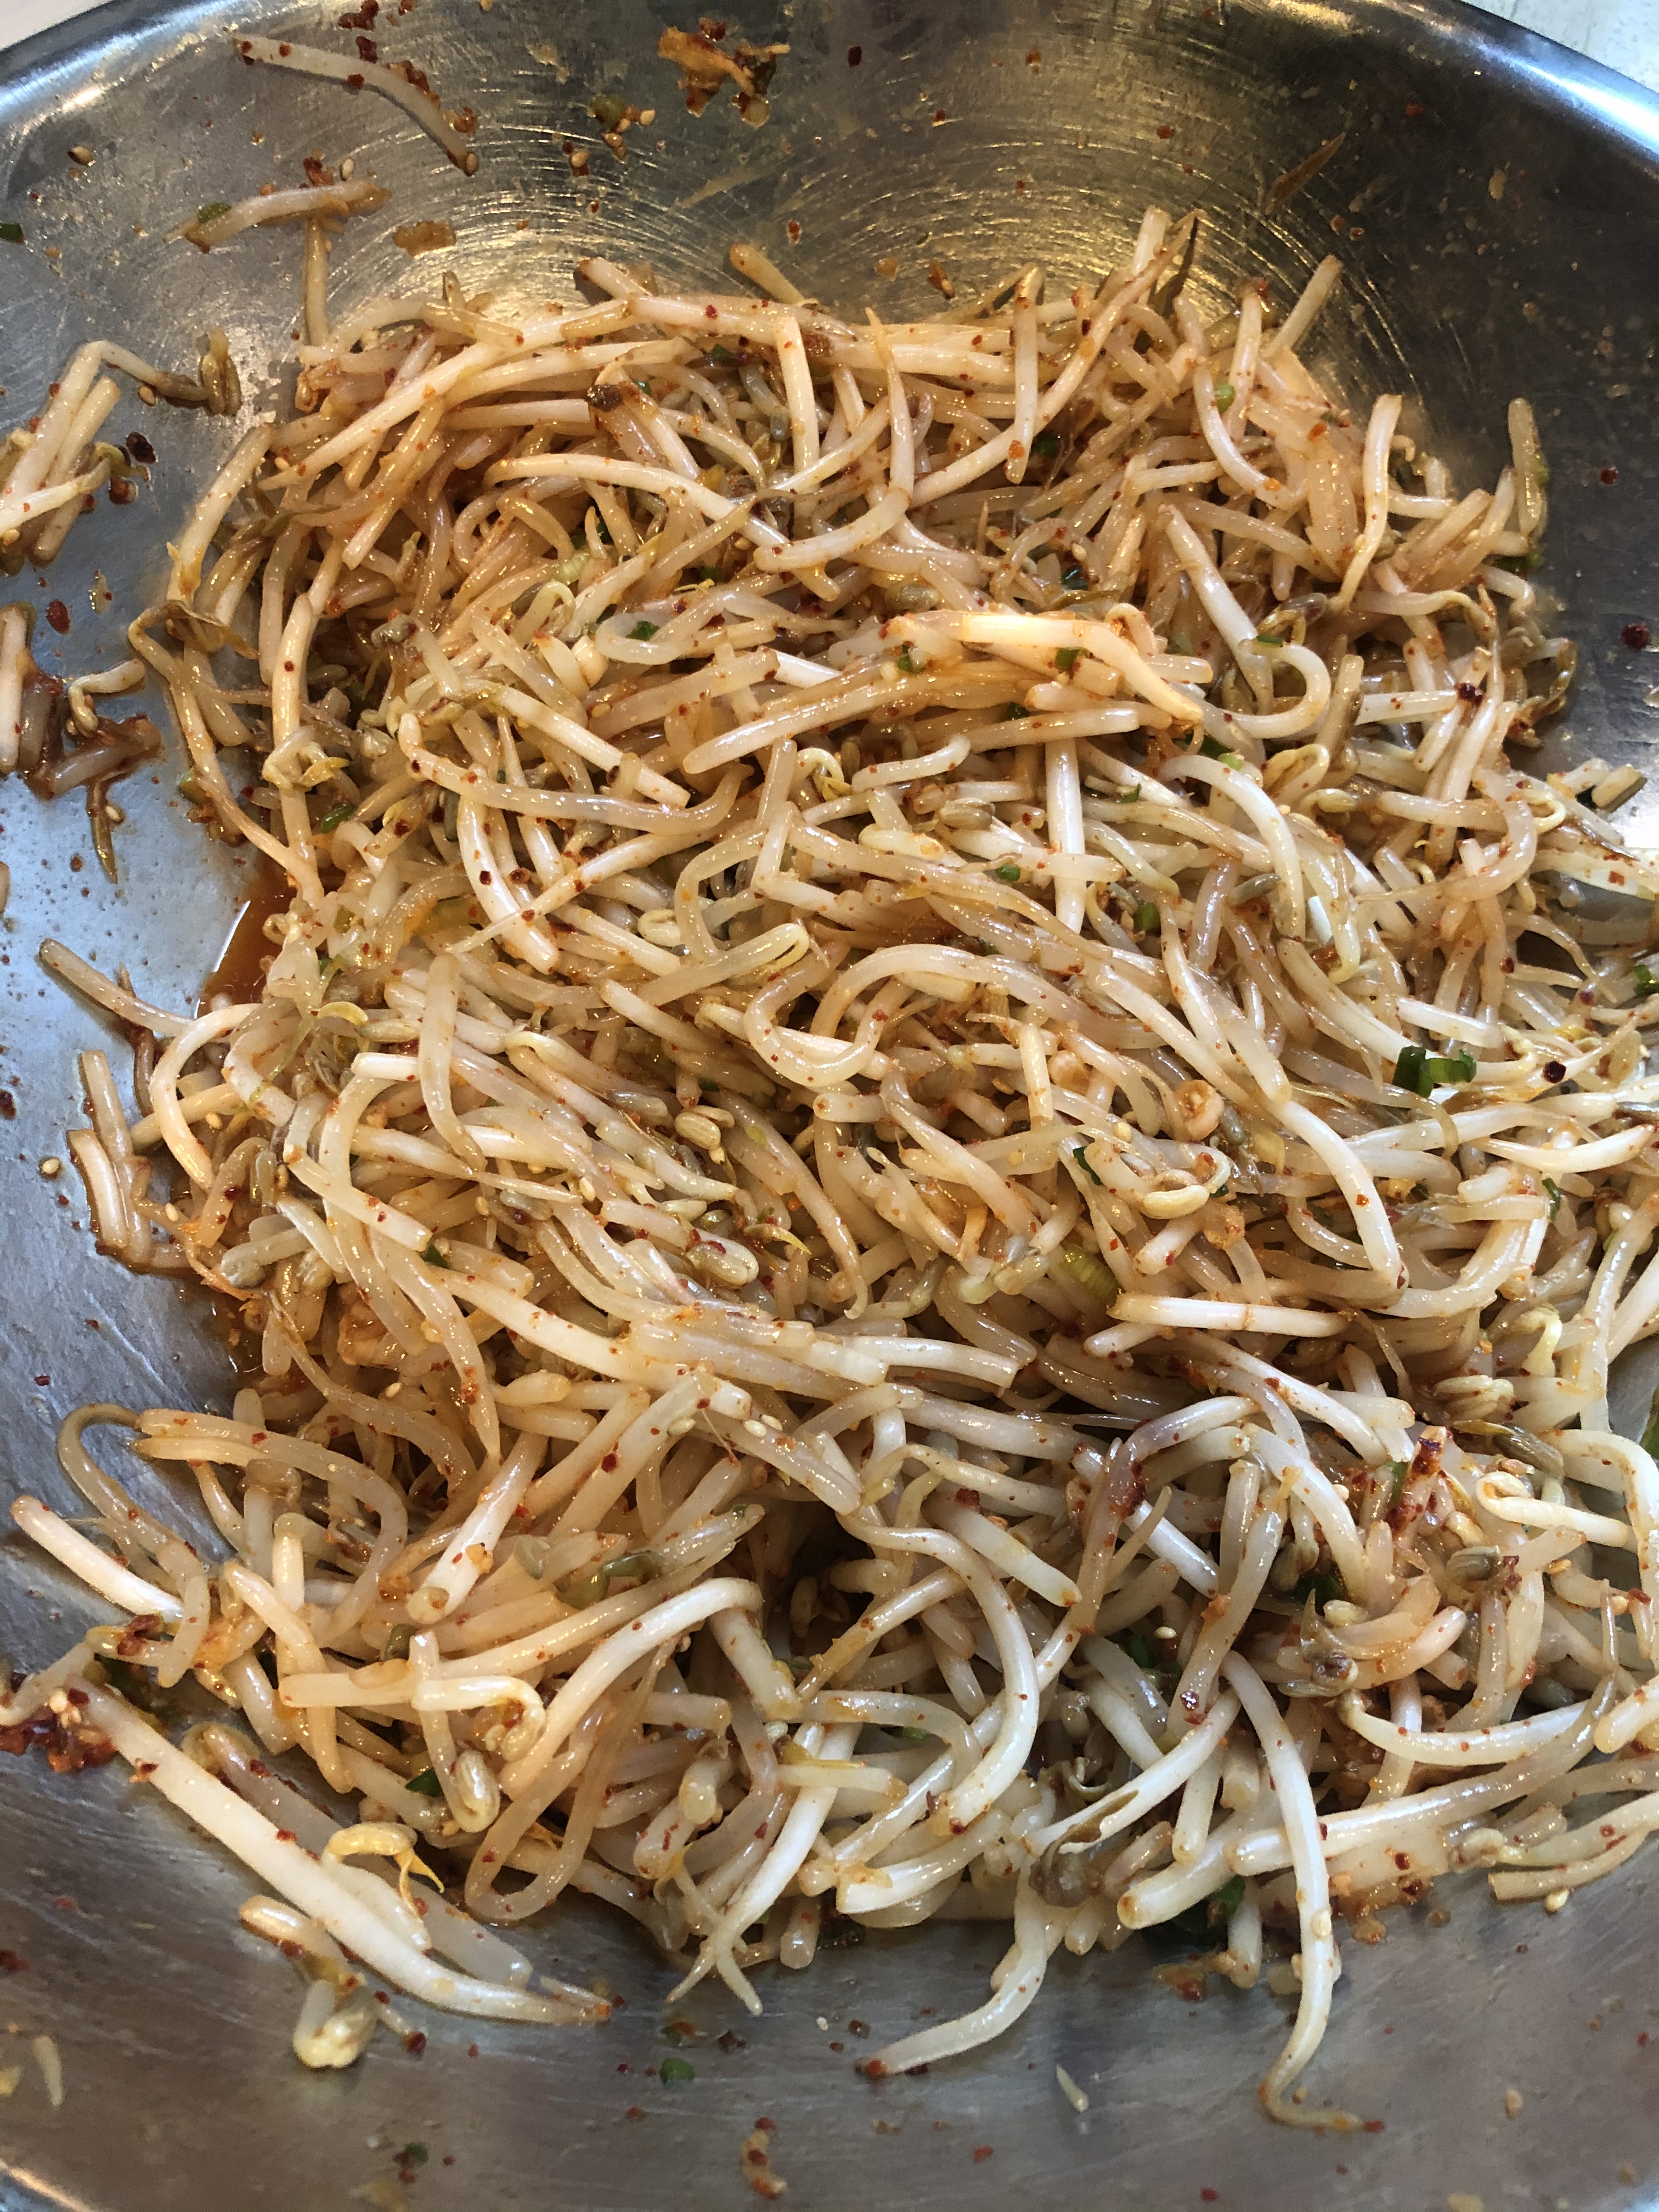
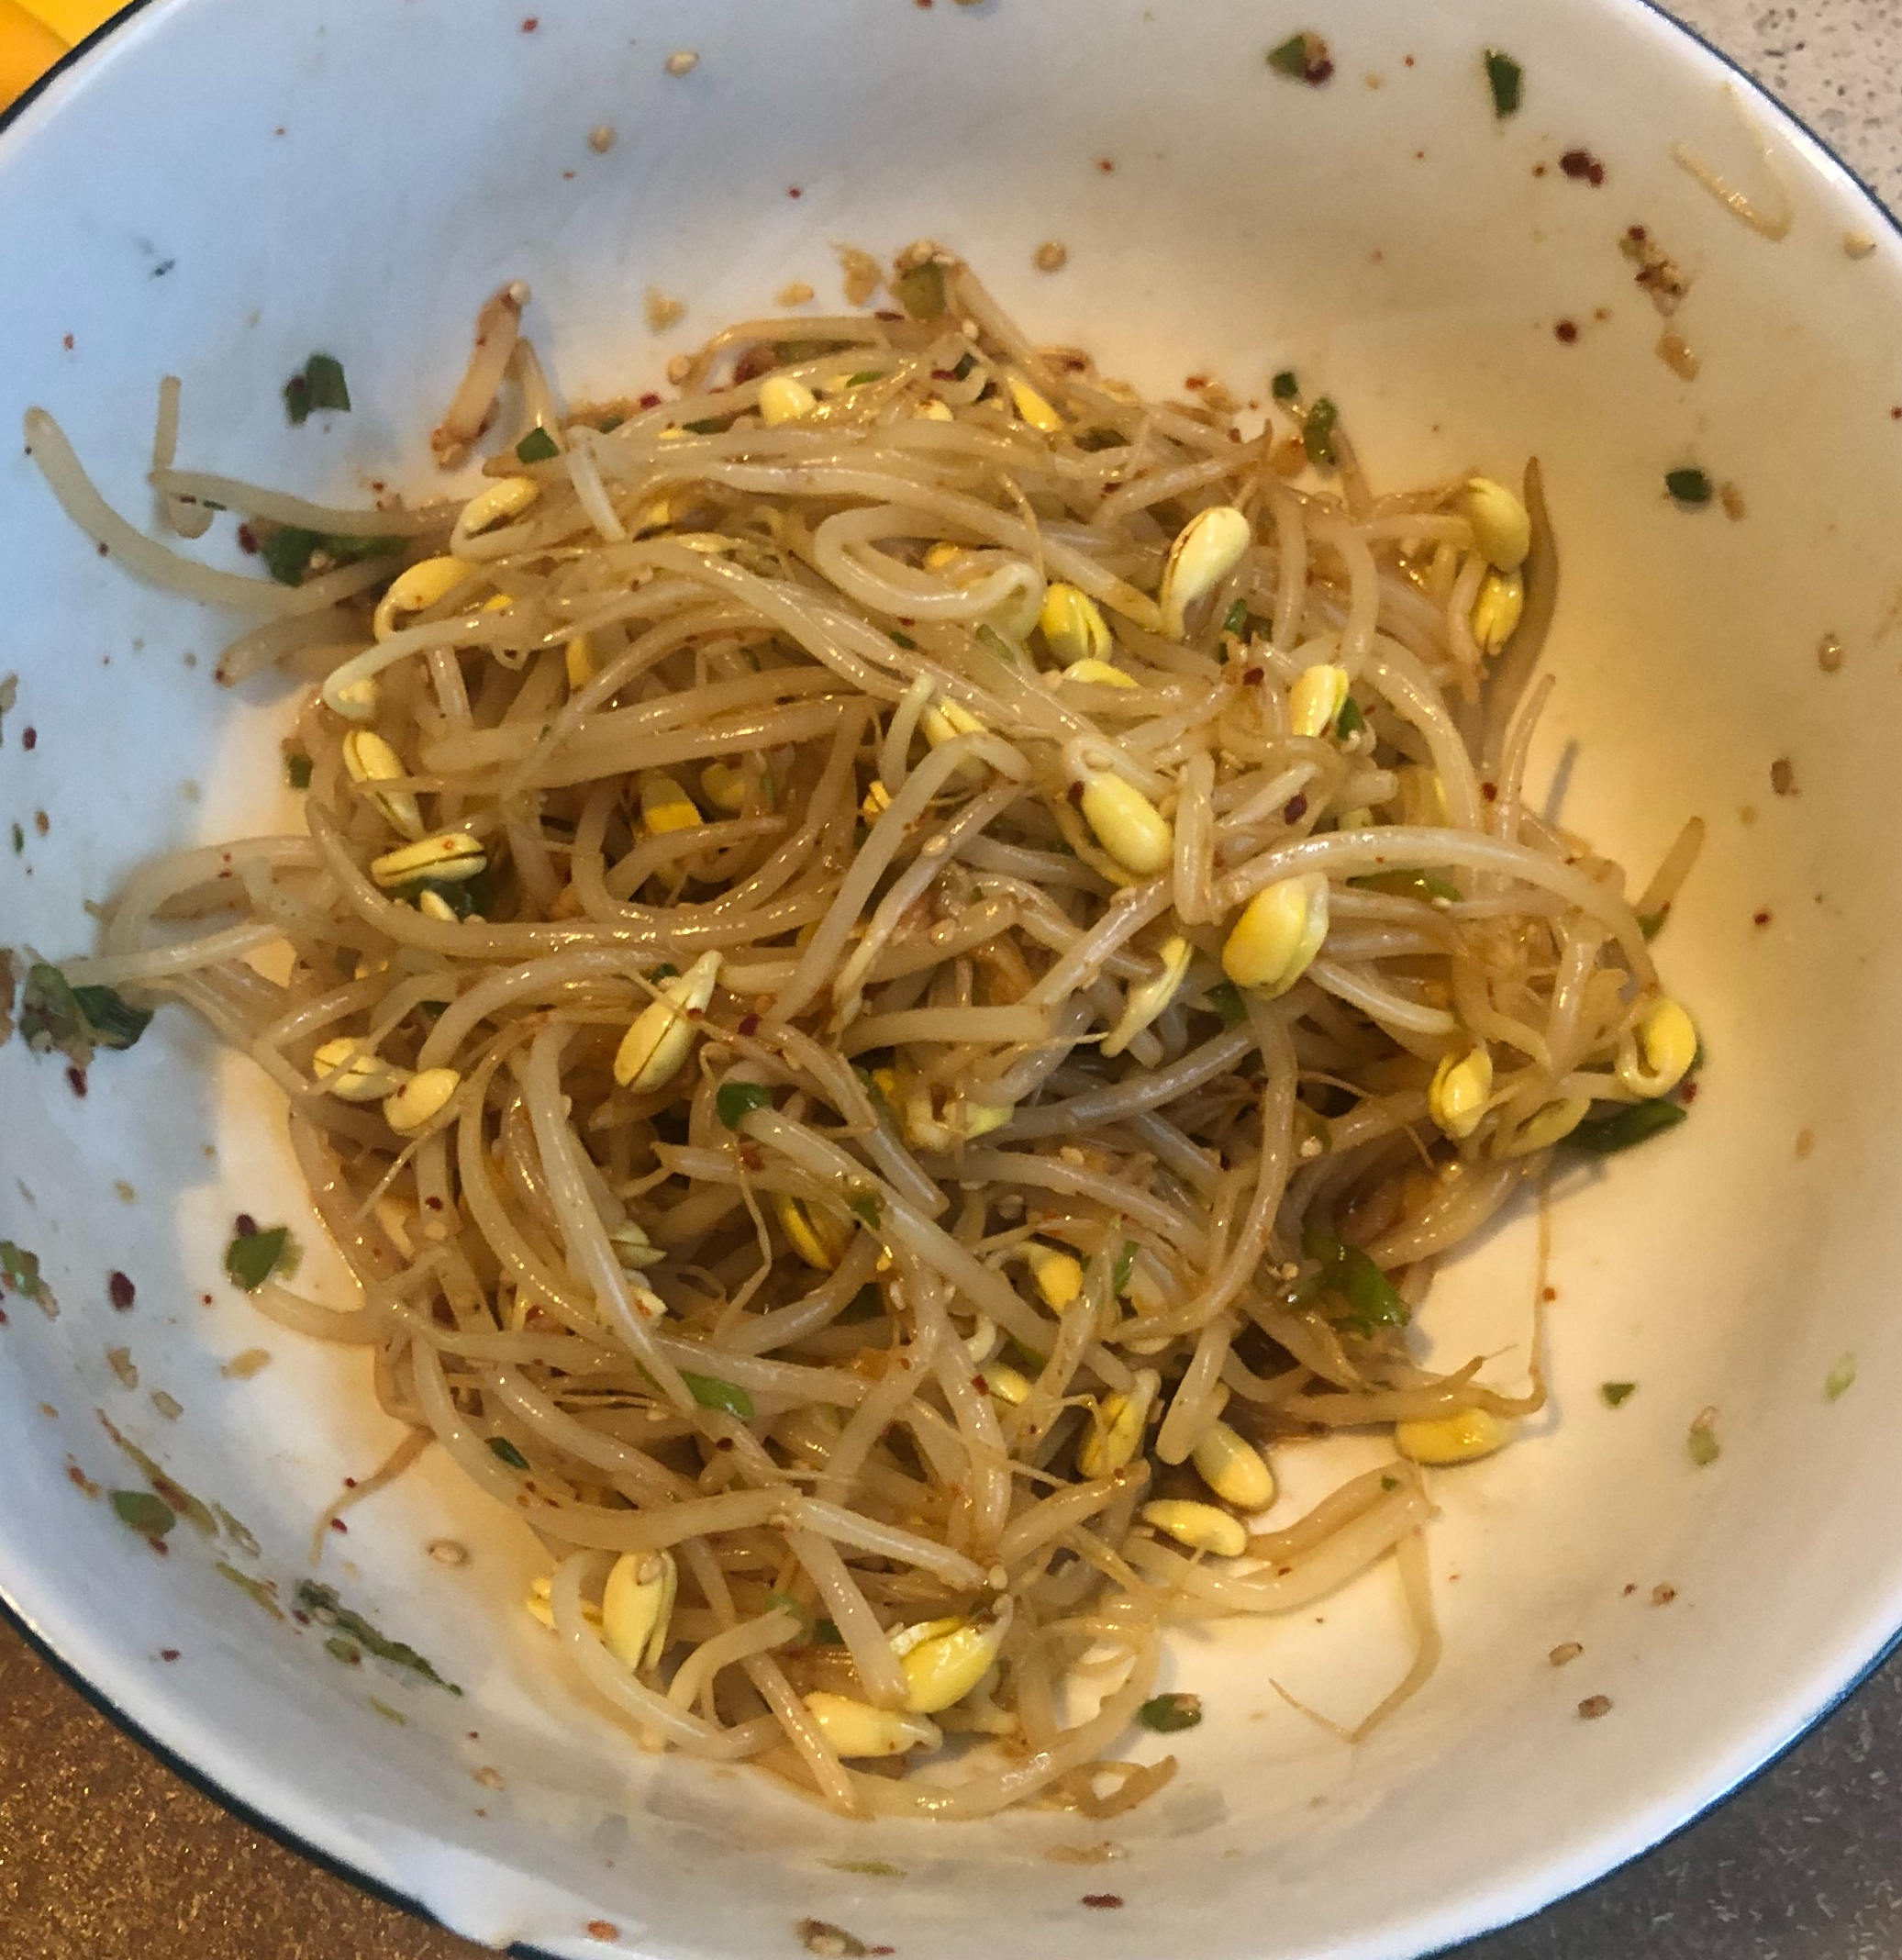
Mung bean sprouts in Korean is 숙주나물 (sookjoo namul), named after Shin Sook Joo, a traitor, because it turns so easily. Seriously. It turns slimy if left unused for a few days so make sure to eat it quickly. I once bought 5 pounds of mung bean sprouts by mistake, gave half of it away, and still ate sprouts for every meal for three days. Soybean sprouts are much sturdier and it kept well in the fridge for almost a week after purchase.

Individually wrapped soup base

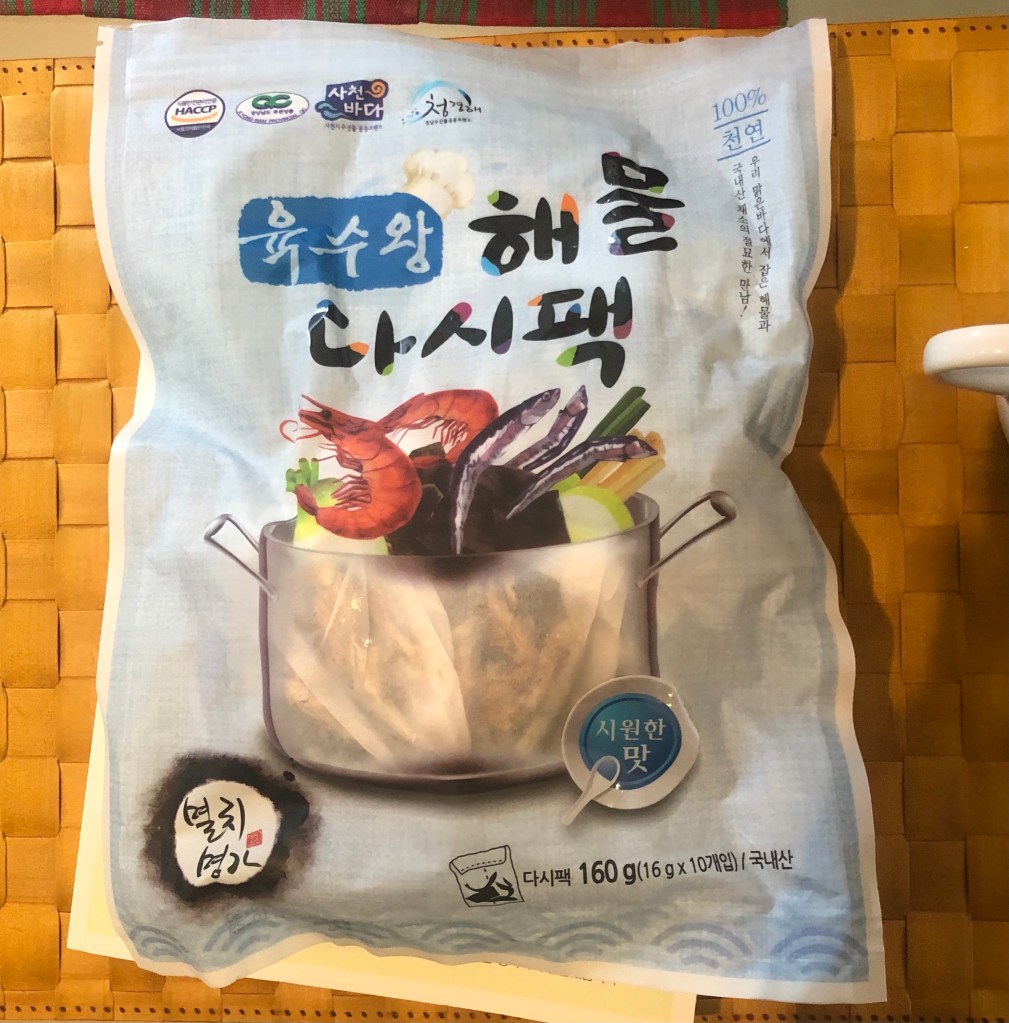
Secondly, I never have dashima (dried kelp) or dried soup anchovies in the house. My mom used to send me both but that was when I wasn’t cooking Korean food much at home. Also, I only ever need a bit of each at a time so much goest to waste. Then I discovered pre-packaged dashi soup base, individually packed in large tea bags! It’s about $12 for a pack of 10, so a lot more expensive that buying the dashima and anchovies separately. (It comes in a spicy version, too). However, it’s perfect for me since I don’t cook Korean soup every day and I hate to waste good ingredients. While dried goods have long shelf lives in general, they don’t last forever.

With both problems solved, I made 콩나물국 for the first time ever.

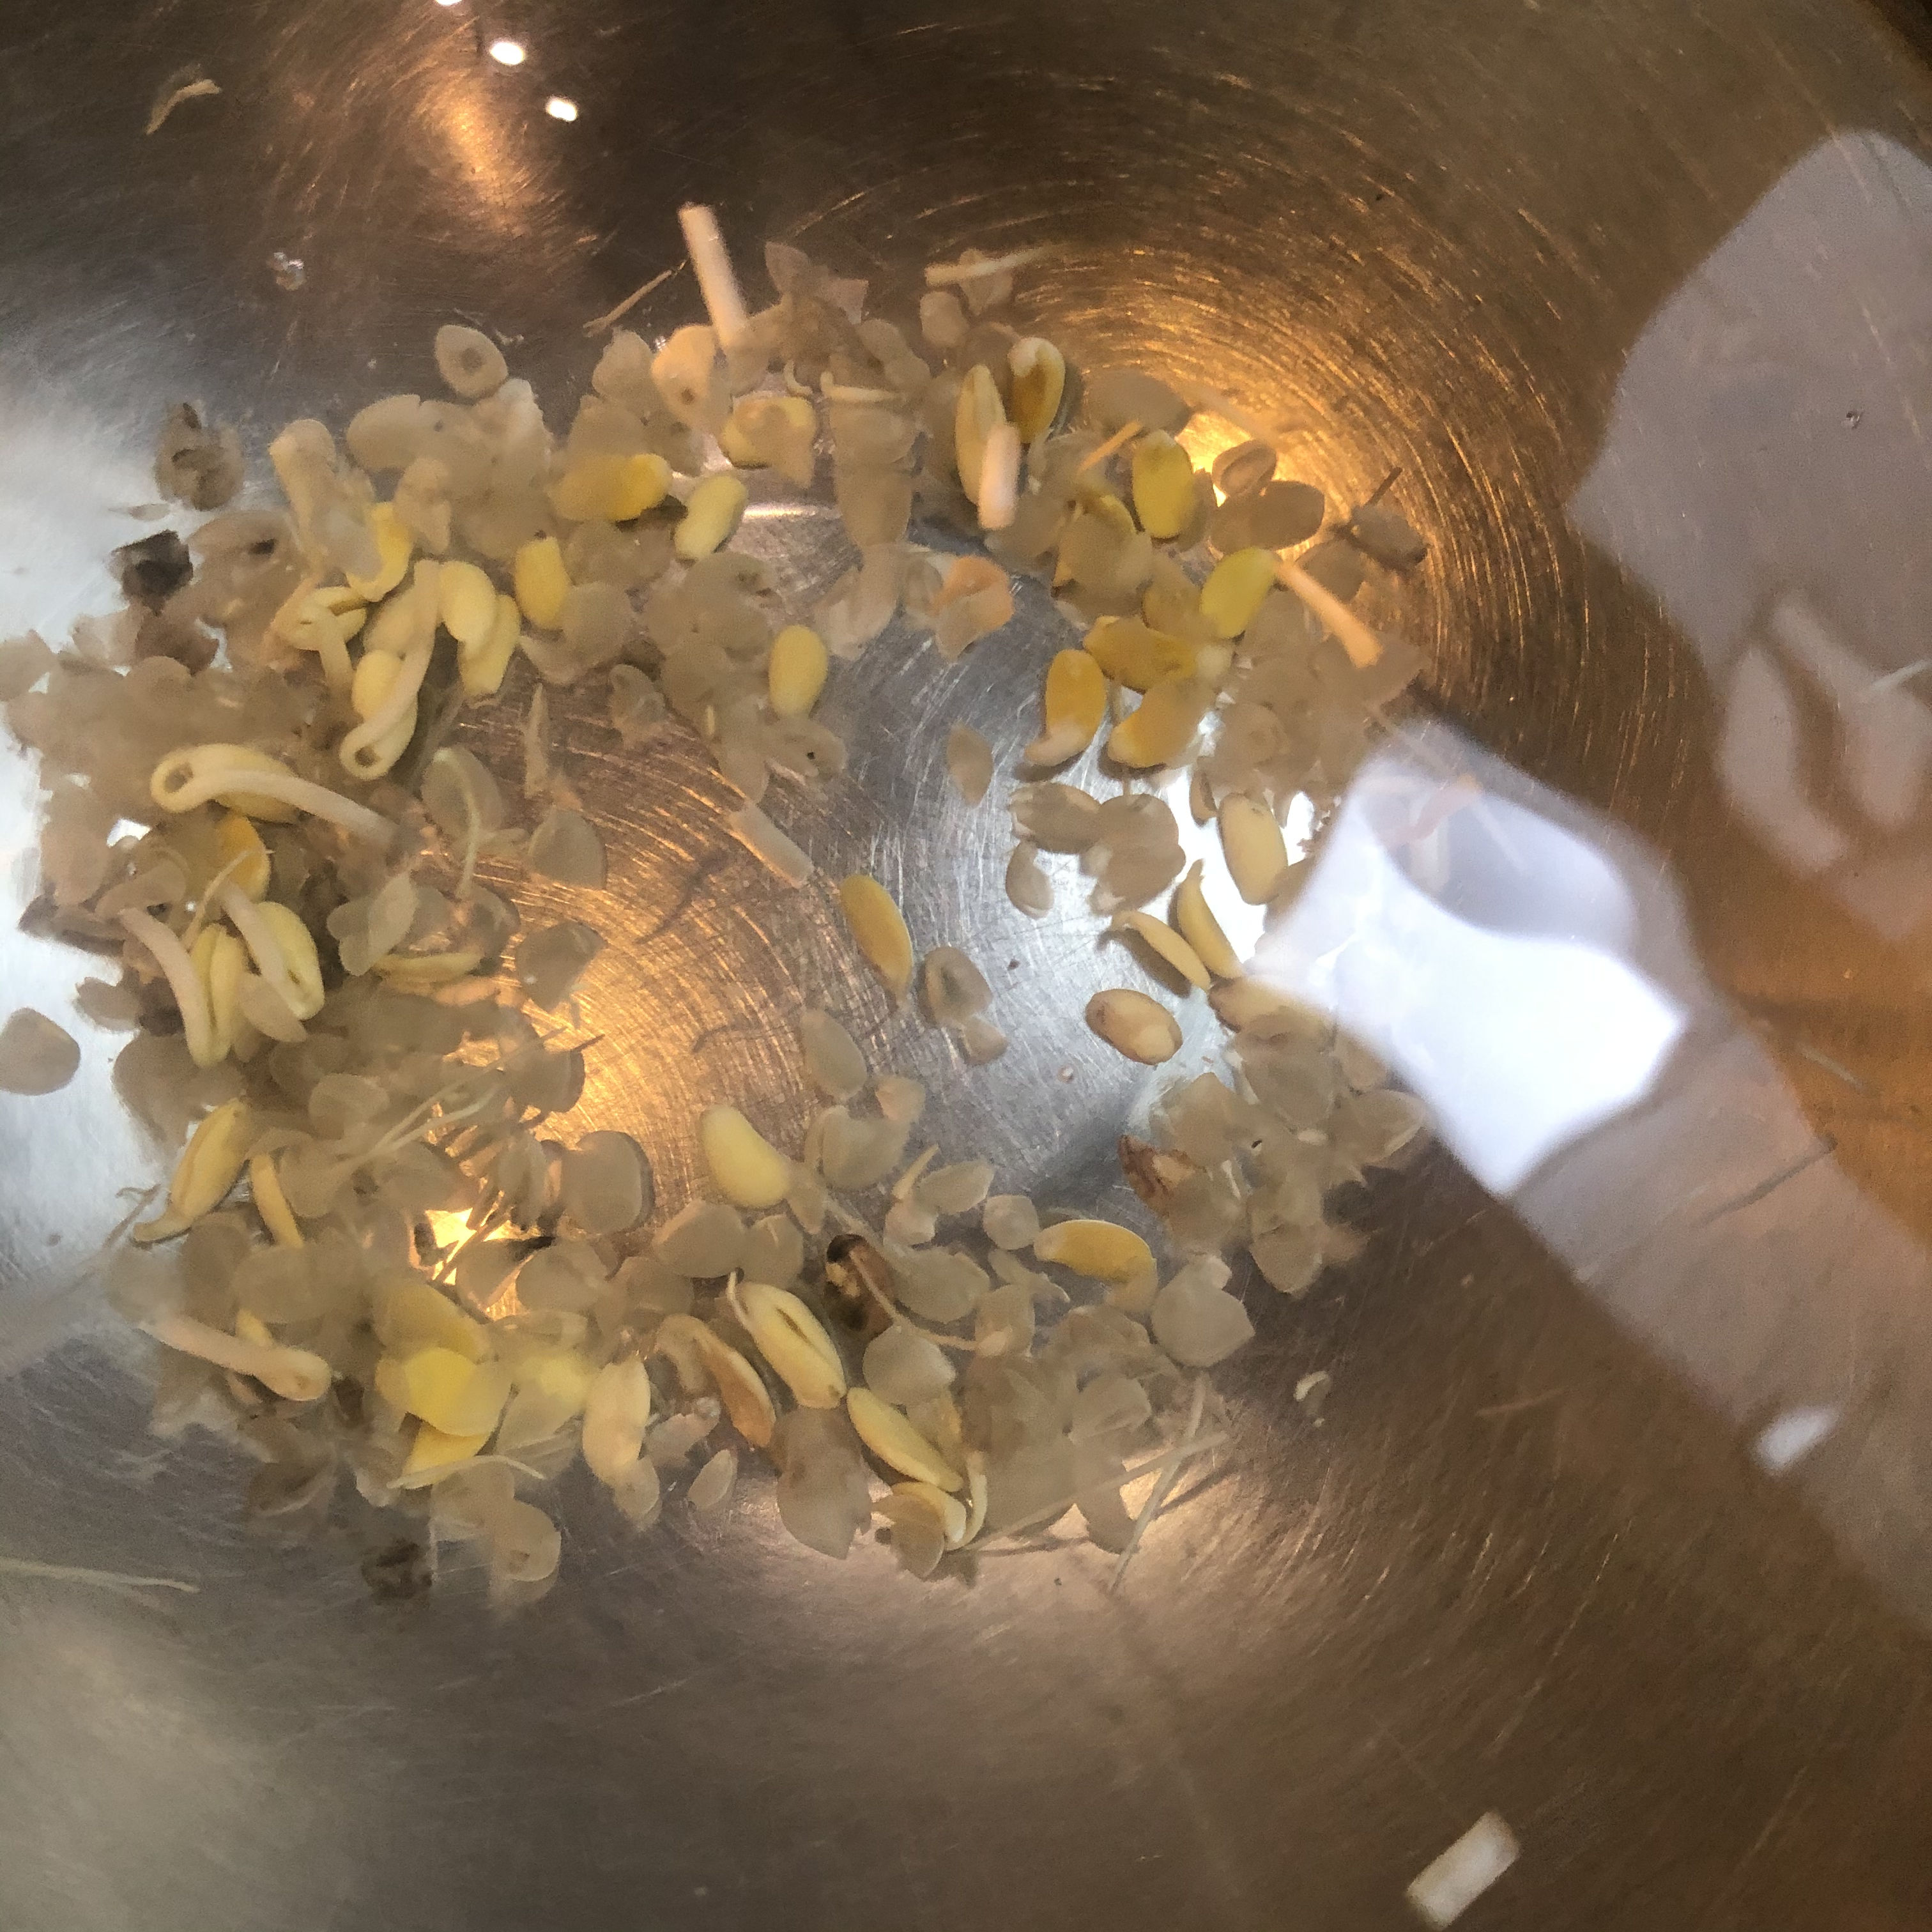
First, you have to rinse the bean sprouts in cold water and drain it. Even though the sprouts themselves are pretty clean, it may have some peels floating around (you want to get rid of the peels).

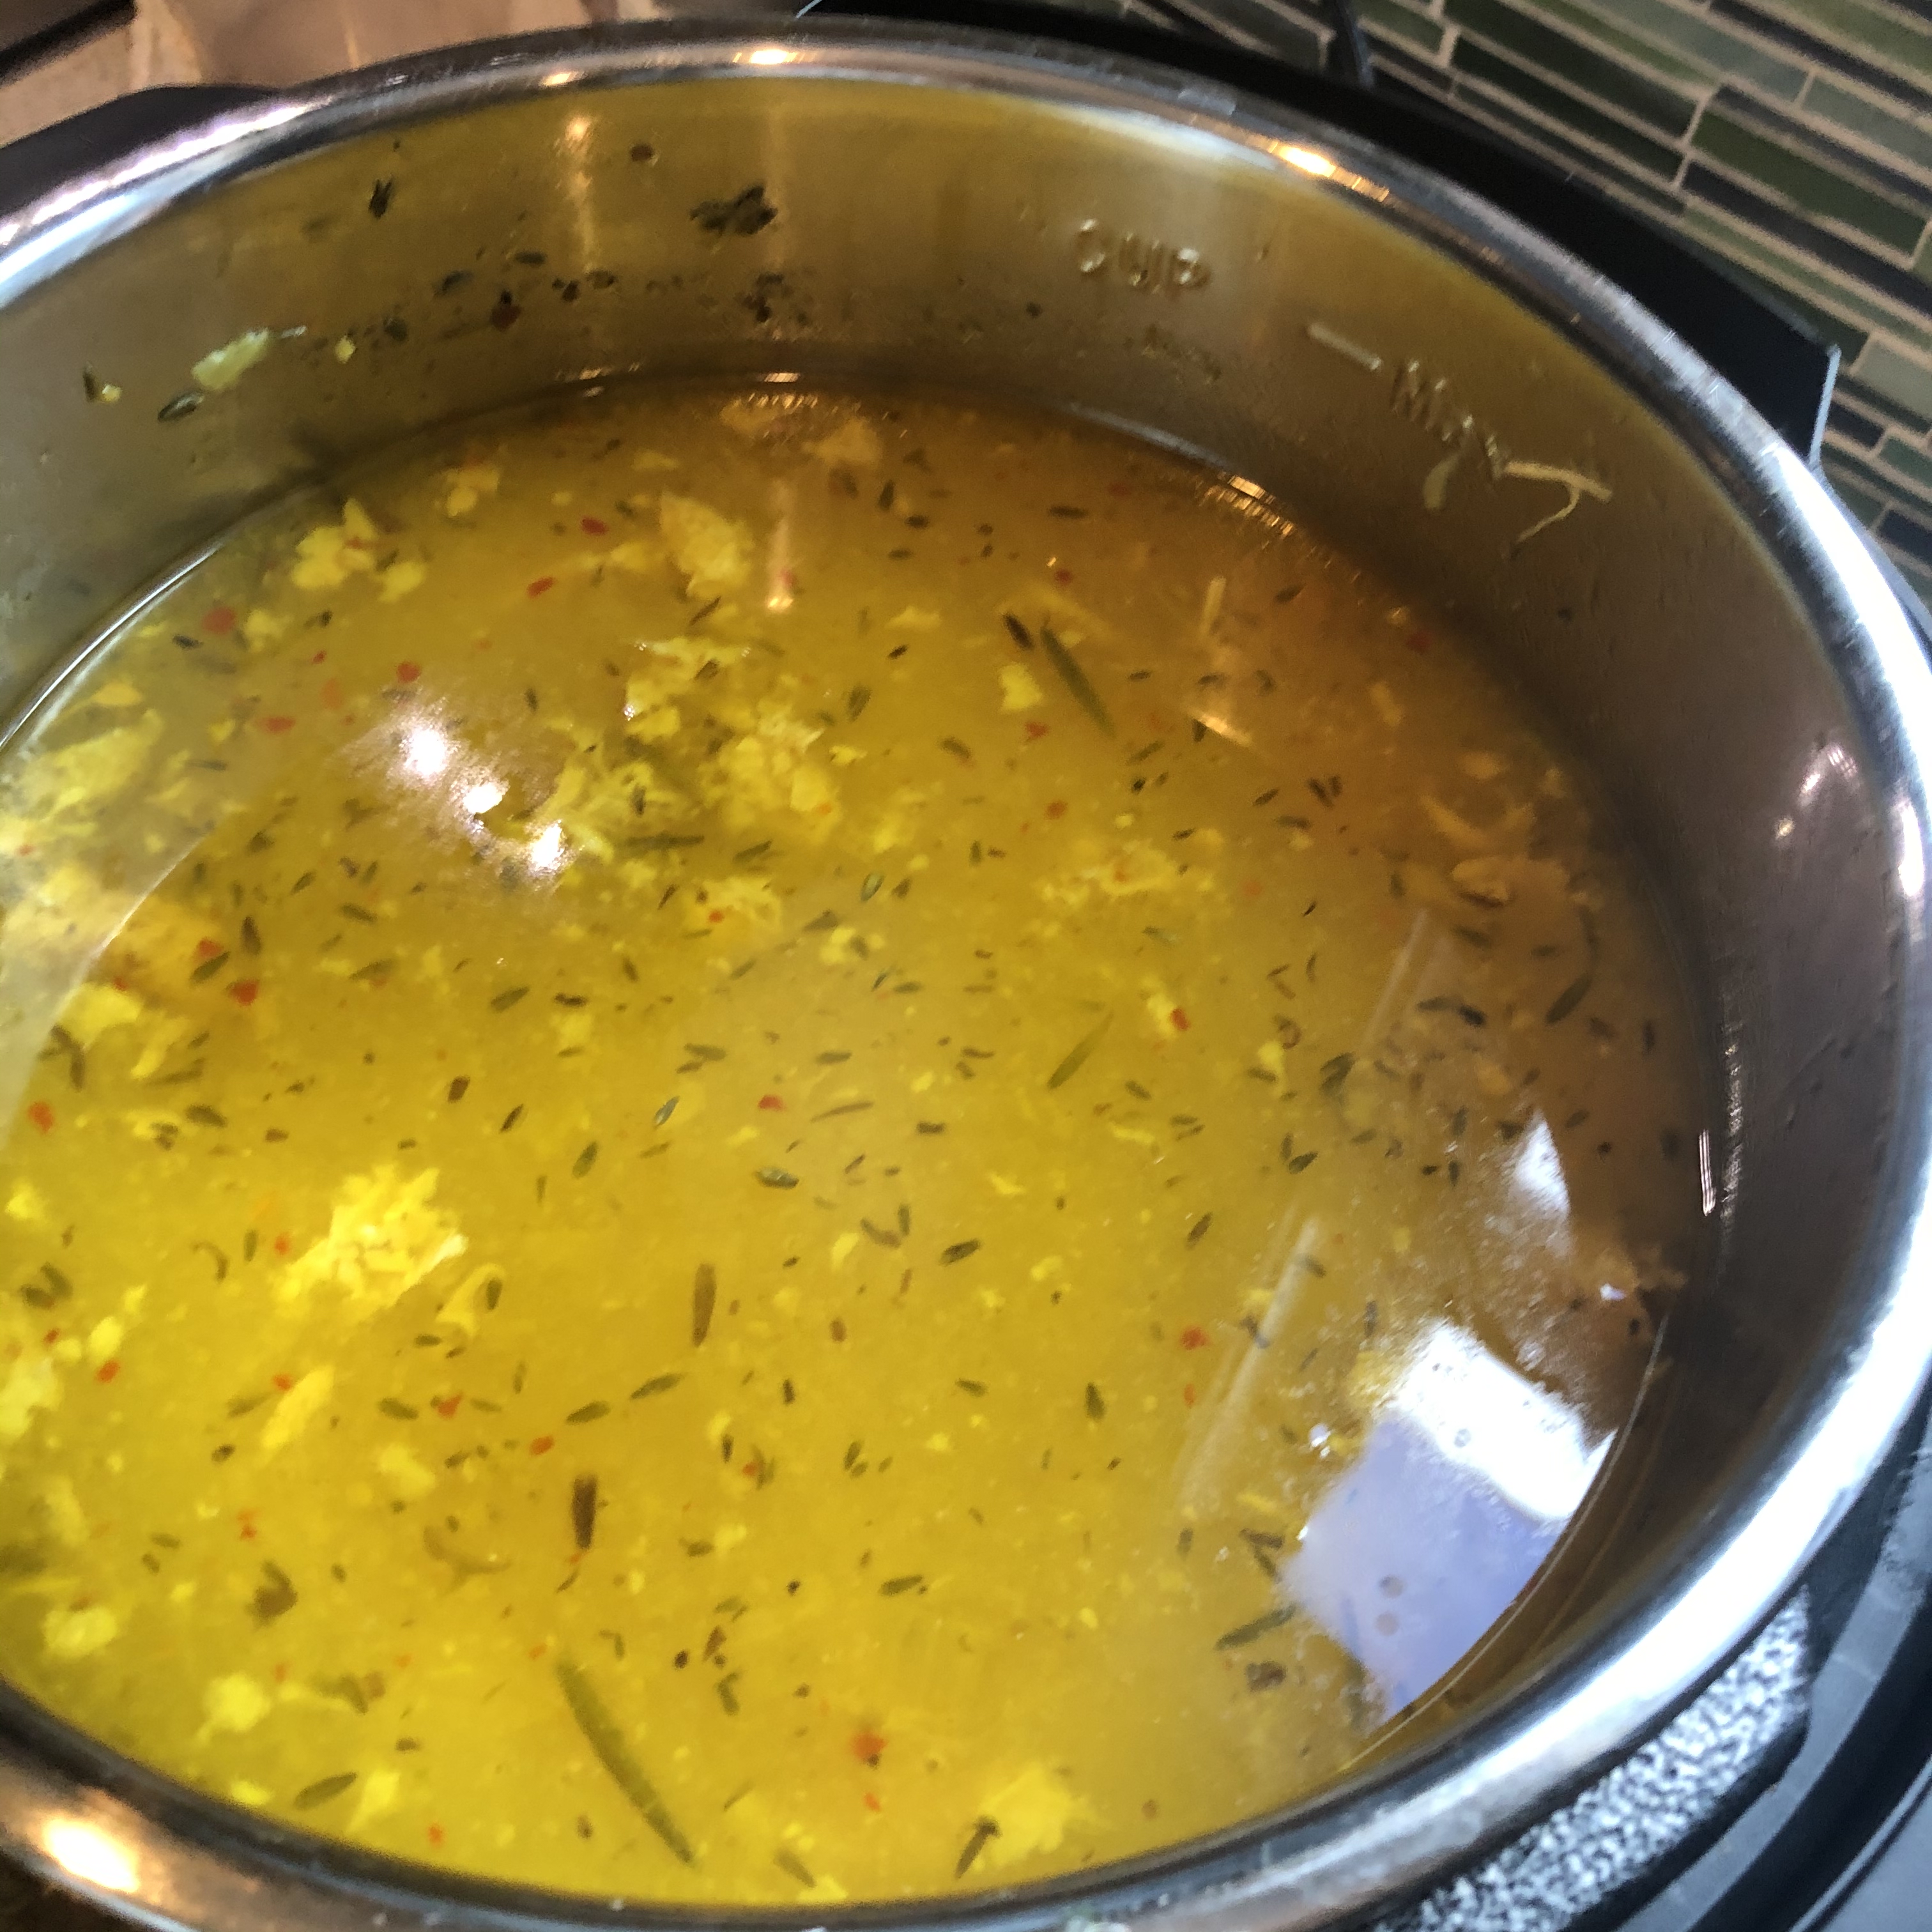
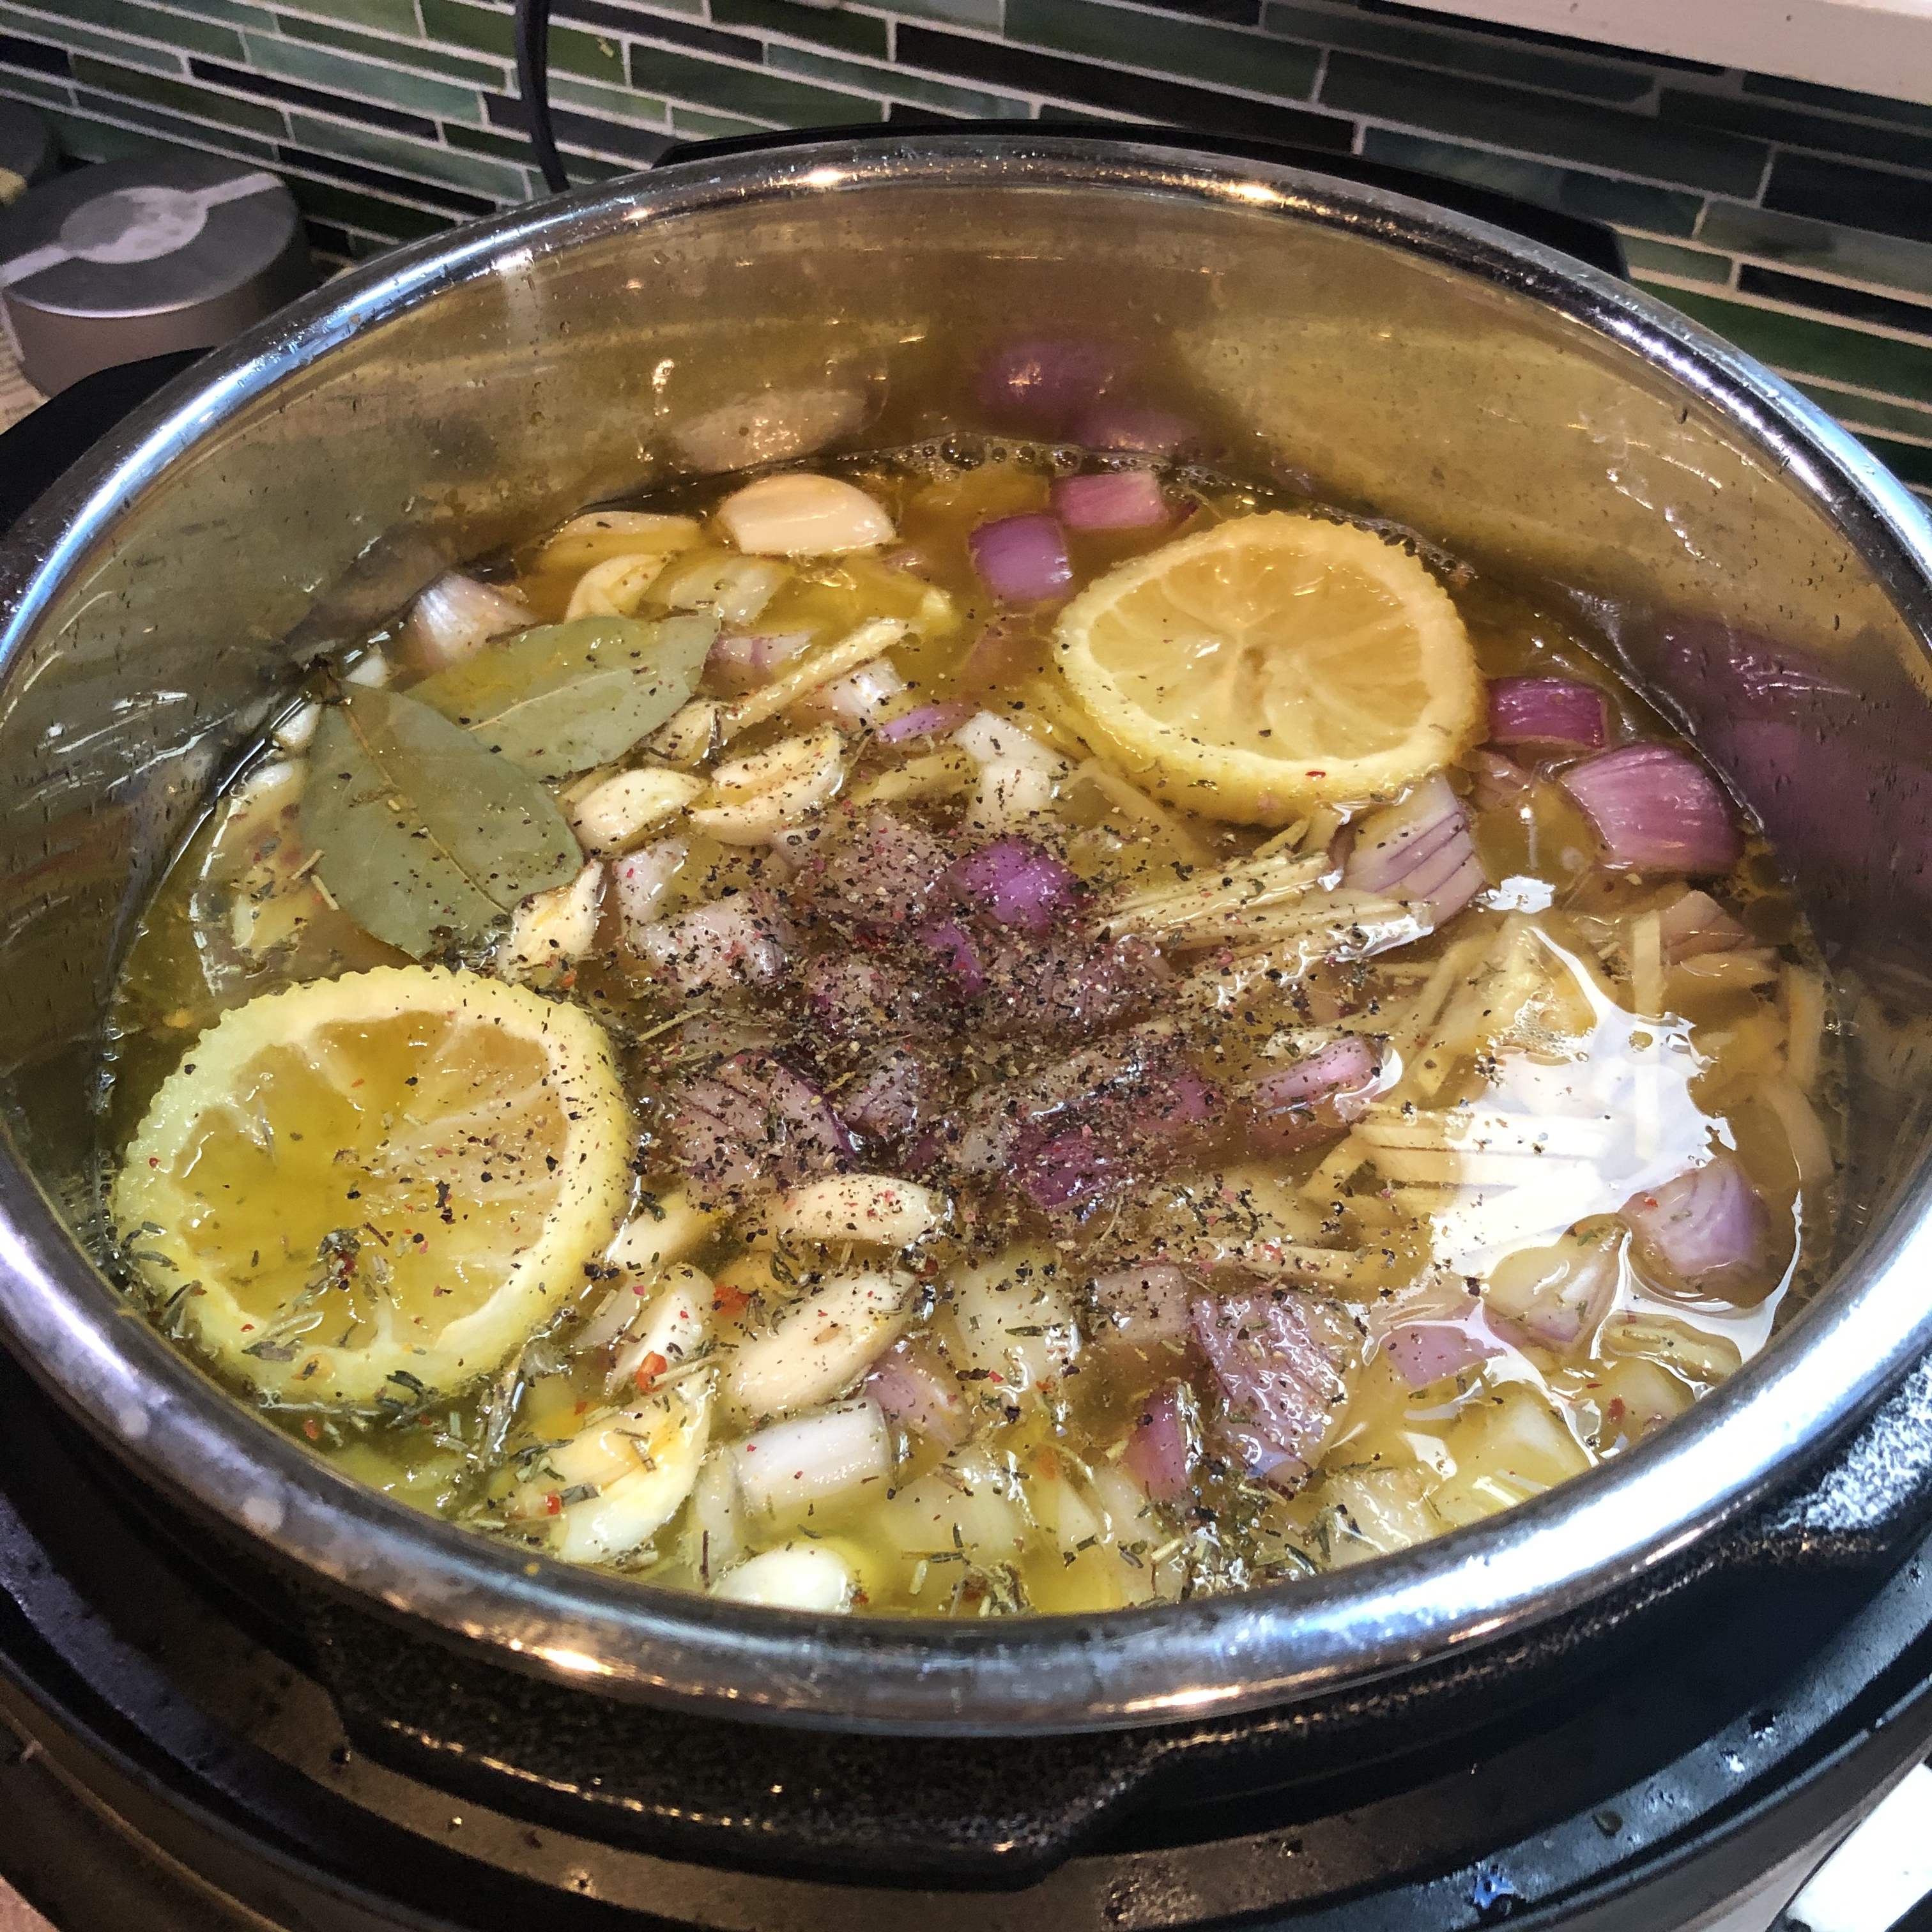
Then, it is basically putting stuff in a pot and boiling.

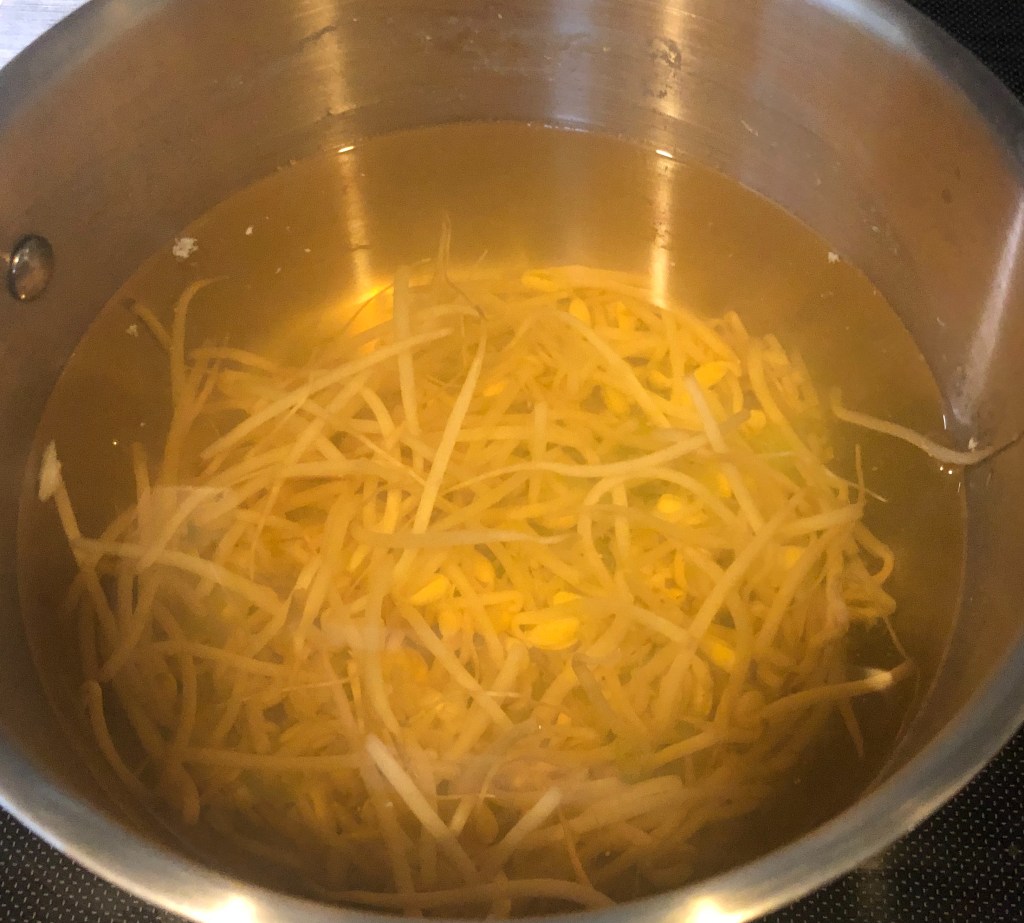
  • Boil 1 dashi soup base in 3 1/2 cup water for about 10 minutes.
  • Add 1 cup washed soybean sprouts and boil for another 4-5 minutes uncovered.
  • Add 1 tsp salt (or shrimp sauce) to taste, 1 tsp crushed garlic, and 1 Tbsp chopped scallions and boil for another minute or so.

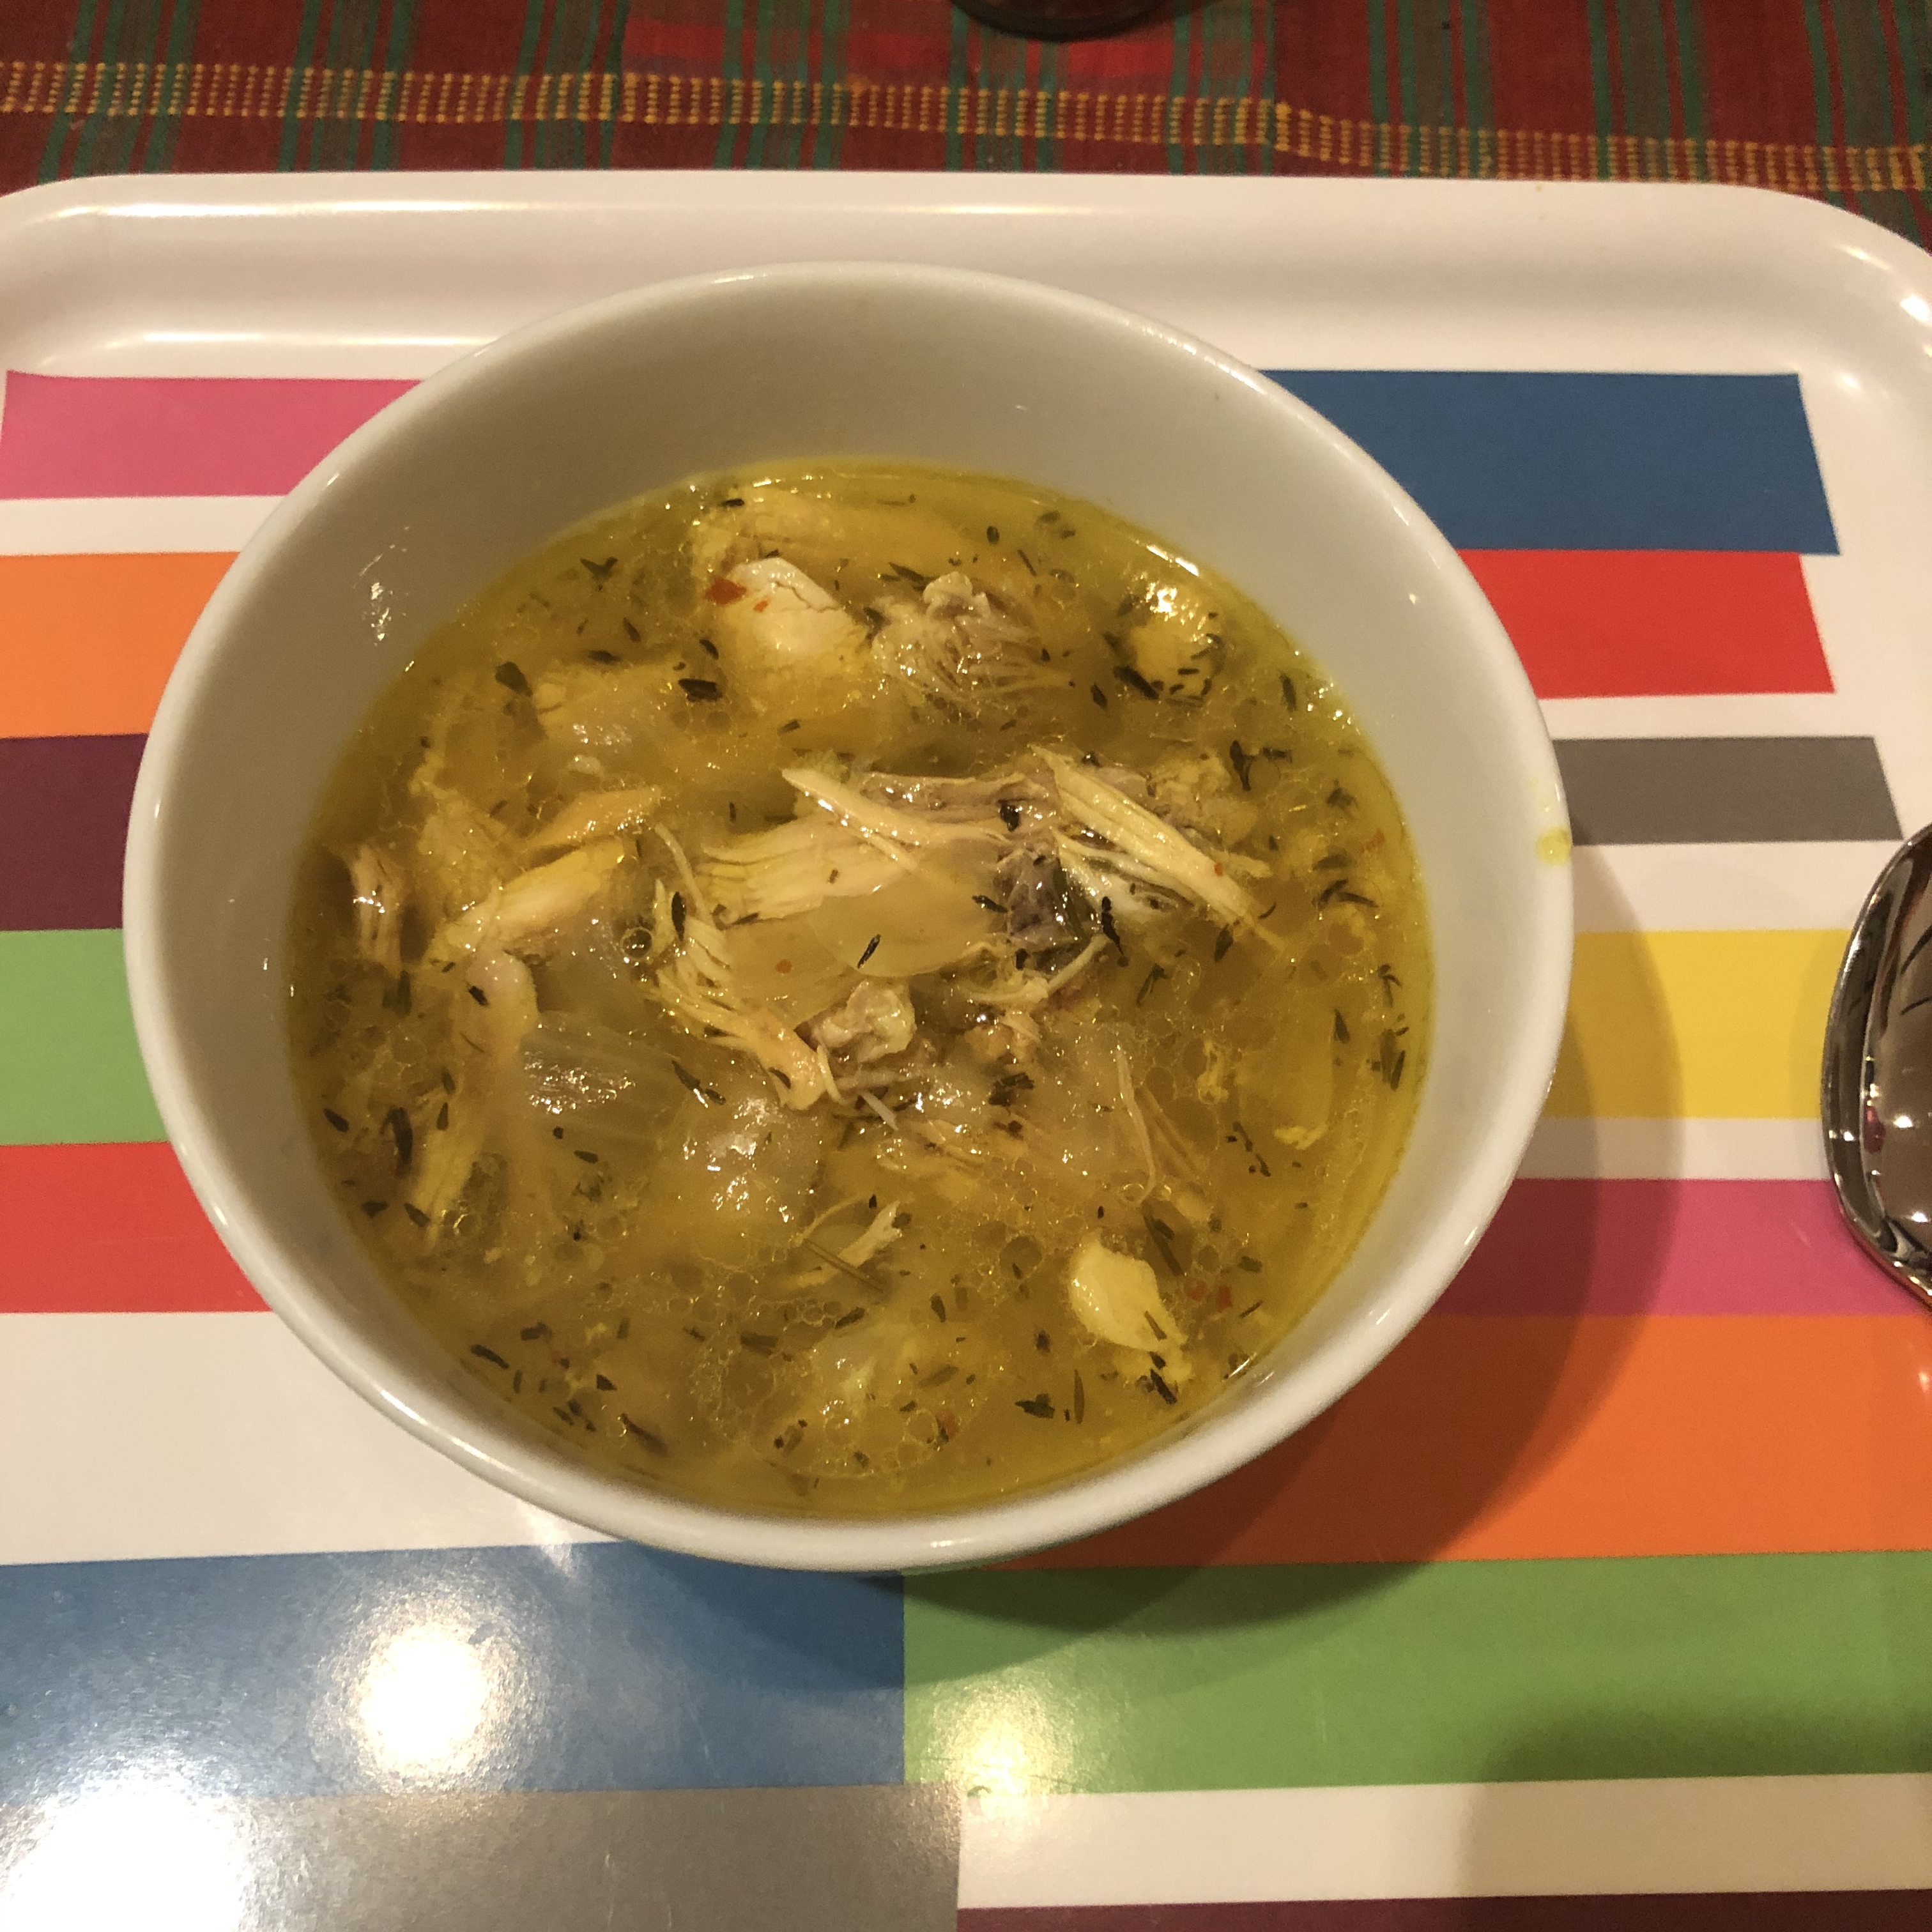
You got soup. From beginning to end it takes about 20 minutes, much less if you already have the broth in hand since all you have to do at that point is throw in the ingredients and boil. You can add some Korean pepper flakes, the course one, not the ground powder, and more scallion for garnish.

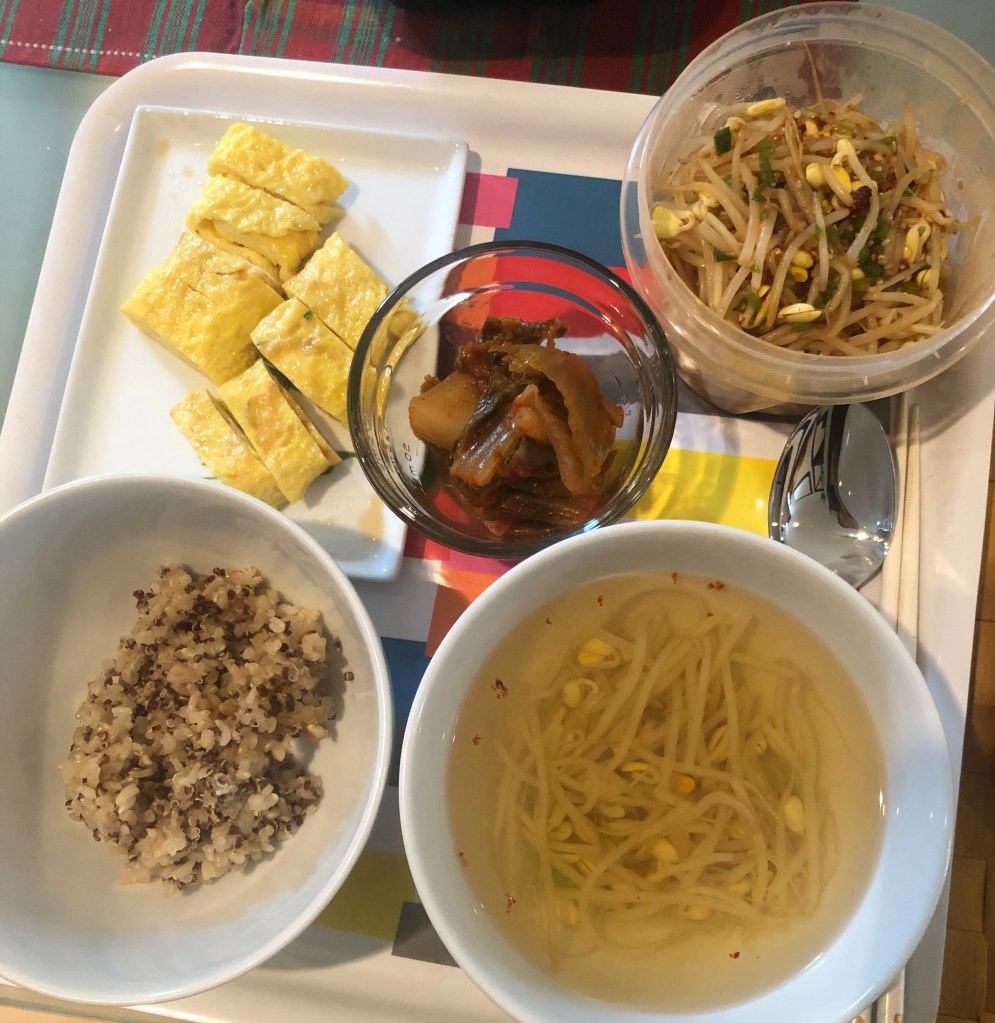
콩나물국 is a common hangover food and has been proven to help due to its arginine content. Hair of the dog aside, it’s probably a healthier choice over a greasy breakfast. I had it for lunch with some rice/quinoa, kimchi, rolled egg omelet, and 콩나물무침 (soybean sprouts in sauce), minus the hangover.

It’s been years since I had it. I don’t know how to describe the taste of it; it’s simple and complex all at once and the only unsatisfactory word that fits is umami. I am not sure if it tastes the way 할머니 made it. But I did choke up a bit because of its familiarity and its association to her. I can’t rightfully say memories, because there are no specific words or incidents or experiences that I can point to as the reasons why her loss is still so heartfelt after twenty years. Perhaps, it’s just the absolute simplicity of it all that makes it so profound. Just like the soup.

Cooking

Roasting meat in the oven for the first time

As much as I love eating meat, until the COVID era, I rarely cooked meat at home. When I did, it was usually the kind that sits in the slow cooker or pressure cooker–the dump-and-press-a-button method. Occasionally, I would be inspired to make oven cooked meatballs. And, in case you were wondering, no grilled meat because we actually don’t own a grill. The 5×8 back patio right next to the kitchen through a sliding door was probably designed for the favorite American way to cook food but somehow, I was never inspired to add that to my repertoire. Since we hardly ever have guests at home for dinner, there never was an occasion to roast a big hunk of meat in the oven.

That all changed with a shoulder of lamb shawarma.

One lazy afternoon, I was flipping through the local food news and read that Kanella Grill had a $100 lamb shoulder special, a take-home-and-cook deal, that sounded pretty amazing. On one of my runs, I stopped by the restaurant to check out what that entailed. I was reading the details fairly closely when a man walked out of the door with a cigarette in hand. Even behind the mask, it was unmistakable that it was Chef Konstantinos Pitsillides byt the piercing blue eyes made famous by Giles Coren’s “Million Dollar Review”. We exchanged brief greetings and he said to call at least 24 hours in advance because the spices needed to be marinated for at least that long. I took note and found a day in the next week to call in the order. I received a simple text to pick up the lamb the next day in the early afternoon.

Chef Pitsillides opened the door and motioned me to come in. He gave me a quick tour of the kitchen, empty of people but spic and span and readied for the evening take out business. I must confess, it was a fangirl moment for me. The Chef probably does not remember, but when my in laws were visiting one time, we went to his larger (now closed) restaurant for an amazingly memorable dinner. After the Dude’s family left Lebanon, they finally settled in the Greek side of Cyprus and that is where he grew up until coming the the United States for university. Having spent his youth and most summers beaching and hanging out with friends, he considers Cyprus his hometown in many ways. The food that was served were reminders of his childhood and, for his parents, nostalgia for a place where they lived for over twenty years. When the Chef came by to check on us, there was much chatter about places and experiences, none of which I knew about but could relate to since it is the same warmth that glows every time I talk about Ghana with people from a similar time. With the dessert, he brought out his private stash of Lebanese arak to share. My in laws still talk about that dinner.

Handwritten cooking instructions

The Chef emerged from the basement with a large plastic bin wrapped in plastic in his arms. It was the ENTIRE shoulder of lamb pierced with two deadly looking skewers. I could smell the spices and marinade through my double mask. He pointed to a handwritten note taped to the top with the list of ingredients and brief instructions. He asked how how my oven temperature went up to and said 375F was probably the right temperature. He reminded me to make sure to rest the shoulder for a good 2 hours before slicing into it. But, he said, I could trim the edges while I waited to make sandwiches, which is what he does. He also handed me a small container of house blended ras el hanout and a tub of labne as an accompaniment. I promised to return the two skewers and the plastic container and walked home with an 8lb lamb shoulder in my arms.

Once at home, I preheated the oven to 375F as instructed. I surmised that the drippings would be too good to waste so I cut up some potatoes and spread it evenly at the base of the pan. I let the oven run empty for about half and hour after reaching the desired temperature then slid in the baking pan.

I won’t lie: waiting was torture. The entire house was filled with the savory aroma of cuminy spices intermingled with the fresh game of lamb. I could almost hear the gentle sizzle of the potatoes browning in the lamb fat. I wondered if it would be wise to open the windows in January and how far the scent will travel and what the chances are of having unexpected dinner guests who ended up at my doorstep by following their noses. The windows remained closed.

I resisted the temptation to snip off bits on the ends while the lamb shoulder rested, even if it was a chef-approve pro tip. It was dangerous territory that could end up being a pound of meat being tasted before dinner. Accompanied by a quick saute of greens (red cabbage, white cabbage, arugula), pan roasted potatoes, labne, and a decanted bottle of xinomavro, the lamb shone. We may have skipped dessert for the sake of decency. We had lamb for three more dinners (It freezes well. Defrost in the refrigerator and pan sear in high heat for 30 seconds each side.).

Recently, I passed by Kanella Grill and the deal was no longer posted on the window. As the weather breaks, restaurant workers and guests get vaccinated, and indoor dining becomes safer, I hope that the boards on the windows are discarded and the blue and white decorated gem of a restaurant returns to the hustle and bustle and sizzle of 2019.

I don’t know if Chef Pitsillides will ever bring back the cook-at-home lamb shawarma special. Meal kits as a concept was an unexpectedly bright spot in the take out dining scene during the pandemic. A part of me wishes that it will remain an option even when restaurants return to traditional operations. I know I will definitely be in line to score another shoulder of lamb.

Baking

Pão de queijo

Several years ago, I traveled to São Paulo, Brazil for work. It was a very quick trip with a colleague who had grown up in Brazil and it was literally four days of back to back meetings. I didn’t see much of the city the two times I was in São Paulo, just a lot of highways and interior of buildings. I remember traffic being so bad that EMTs worked as pairs on a motorcycle so that weave in between the cars to get to medical emergencies. I remember the favelas on the hillside looking down onto one of the most prestigious universities in the country. I remember a vibrant nightlife where bars and restaurants were open late with sidewalks filled with young and old, watching football (soccer in American), laughing, eating, and drinking. I remember walking to the Ai Weiwei exhibit at a nearby museum past luxury car dealerships and posh houses and spraining my ankle on my walk back when I tripped over a flying garbage bag. I remember October being warm and welcoming, just like the people I met during my very brief visits. I remember the look of respect from the bartender when I ordered a cachaça neat instead of the usual caipirinha. I remember the food. Some of the flavors reminded me of the rich stews I grew up eating in Ghana. Some, like farofa, was completely new in taste and texture. And then, there was the ever present pão de queijo.

The breakfast at the hotel and in every coffee service for meetings, there was inevitably a bowl piled high of the golf ball sized bread. On most busy streets, there was a pão de queijo chain shop, much like you would a Dunkin Donuts, and people streamed in and out with a warm bag and a cup of strong Brazilian coffee. Being gluten free, I generally avoid the bread area, especially when traveling for work. There is nothing worse than being on a plane with a stomach ache or having to ask where the bathroom is in a different language. It looked tempting, but I steered clear of it on the first day.

On the second day, I asked my colleague what it was and why it was served all the time. He explained that it was pão de queijo, a traditional Brazilian cheese bread made with manioc flour, an edible root. I had no idea what manioc was but hell, it wasn’t wheat, so from that moment on, I chowed down on as many pão de queijo as I could get my hands on (with a lot of Lactaid pills, I might add). My hosts looked at me wth curious amusement at my enthusiasm for the bread.

The second time I was in São Paulo, I made sure to visit the grocery store to get a few bags of the pão de queijo mix. One of the unexpectedly delightful things about Brazil was that all packaged food items were marked to indicate whether it contained gluten so if I checked for “sin gluten” I was safe. GF package information had yet to be a standard in the United States and since I didn’t understand Portuguese to make out the ingredients, this took the guessing game out of the shopping process.

Once in Philadelphia, I followed the picture directions on the back of the package and was able to make some reasonably good pão de queijo. The problem was I never went back to Brazil and I was out of mixes. I tried out many recipes and finally settled on the recipe on Bon Appétit magazine. Although manioc/cassava/tapioca is used interchangeably, I am fairly certain there are regional differences to the root and consequently the flour that is milled from it. Also, fresh minas cheese is difficult to find in the US so the taste is not exactly as I remembered. Nevertheless, after many years of making it, I think I am finally settled on a pretty good approximation.

The awesome thing about pão de queijo is that it is an all-occasion bread that goes with everything. I have eaten it plain, smeared with jam, as an accompaniment for soup, in place of crackers for a meats and cheese platter, with chili. Explains why a batch doesn’t last more than three days on the counter. It’s best fresh out of the oven but if it’s cold, I prefer to zap it in the microwave for about 12 seconds to get back the chewy texture.

My tips:

  • Until recently, I could only find tapioca flour/starch in Asian grocery stores. Nowadays, it is pretty easy to find now in most grocery stores so I stopped looking for manioc flour. Tapioca flour/starch is very fine so careful when dumping the flour and mixing vigorously–you, and your kitchen, will be covered in white powder. I have to constantly remind myself to pour all the flour gently into the pot all at once then mix quickly but slowly at first until the flour is about half incorporated.
  • We don’t drink a lot of milk at home and whenever I buy a carton, I end up throwing out half of it. Also, during COVID, I shopped much more infrequently so the chances of having milk, especially whole milk, lying around was pretty much zero. Most plant based milk doesn’t have the fat content necessary to bring out the richness of the bread. In a pinch, I tried coconut milk and it worked! I usually have a few single use cartons of shelf stable coconut milk at home for soups and curry. Most recently, I bought coconut milk powder that can be reconstituted with water because I am suspicious of stabilizers on shelf stable items. Works just as well.
  • Minas cheese is fresh cheese so difficult to find, even in specialty cheese stores. I tried many cheese combos suggested by recipes and realized that there was not much variation in texture although there was variation in taste. Over time, I inevitably find bit of different kinds of cheese in small baggies. I started collecting them and when it looks like I can grate about 2 cups, I make pão de queijo. I have even used Bulgarian feta before. The trick is to make sure to have few chunky bits of cheese as possibly for even distribution and rise. The darker bits in the photo below are the cheese chunks.
Pão de queijo made with bits and pieces of leftover cheese, including Cacioricotta del Cilento, Manchego, Cacio di Bosco Tartufo, and 30 year old parmigiano reggiano.

A friend and I tossed around the idea of starting a pão de queijo shop called “Girls with Balls” one day. Who knows? Could still happen.

Uncategorized

The day I saw the light at the end of a yearlong tunnel

Today, March 30, 2021, I got my second Moderna COVID-19 vaccination. The doctor who gave me the shot and I had a chuckle about my T-shirt that said “A lifetime of social distancing prepared me for this” and when I gave her a thank you card after the shot, we elbow bumped with joy although both our instincts was to hug. She recited a long list of possible reactions to the vaccine–basically, that I will feel rotten for the next 24-48 hours but that I will be fully immune in two weeks.

To prepare for the next two days, I made a big pot of my chicken soup, this time with lemongrass, Korean pear, and fresh turmeric, rosemary and thyme with bits of carrot. I also made a flourless chocolate cake with a coconut white chocolate glaze.

When I received a notification to set up an appointment to get vaccinated, I hesitated. I had registered with the city and mentally prepared myself to hunker down till about June when my turn would come. With vaccines now available, the next dilemma was who should get it, as briefly discussed in this NPR story. I thought about my friends who were struggling to get their elderly parents vaccinated and colleagues whose districts had supply issues, even for those who were on the priority list. I also found out that many folks at the boundaries of the city were not yet aware of the FEMA vaccination site at the Convention Center where hundreds of doses were leftover at the end of the day due to no shows and cancellations. Those were being given to people who could drop everything and get to the site in less than an hour. And then there were the line jumpers, making up cockamamie stories to get in front of the line so that they can “get back to normal”, whatever that is nowadays. In short, I did not want to be a jerk.

Later that day, the dude said he received a notification as well, almost at the same time that I did, and that tipped the scale for me. We agreed that we will take it as winning the lottery, thanked the gods, and signed up together.

The security guard at the door of the vaccine clinic today congratulated people exiting from the site, and to one person who got her second shot, he said, “Celebrate! Get champagne!” Maybe later. For now, chocolate cake seemed like the right speed.

I don’t usually make cake at home. It’s too dangerous. The temptation to eat half the pan is always present. Cake recipes are never for a two-person household and flourless chocolate cake often calls for a half-dozen eggs making it a calorie bomb. After some digging, I settled on the King Arthur Flourless Chocolate Cake (which is ironic since it’s a flour company) which had 3 eggs and lots of chocolate. It’s very very chocolatey and rich and almost impossible to eat more than a small slice at a time.

Melting butter and chocolate

The recipe says to microwave the butter and chocolate. I never do that. Let’s just say that I have had enough butter explosions in the microwave that required scrubbing oil stains and, especially when mixed with chocolate, it’s a minor kitchen disaster. I start too cautiously, maybe 15 seconds at a time, then get impatient, and end up boiling the butter to eruption.

Instead, I do the double boiler method (stainless steel mixing bowl over a pot of water boiling on the stove), so that I have better control over the texture and consistency of the chocolate/butter mixture.

In fact, my default is to mix everything by hand. No fancy stand mixers or even handheld electric mixers. I don’t even use the attachment that comes with the immersion blender.

Perhaps I am just a control freak….

One kitchen hack I read somewhere a long time ago is that if you spray your baking pan, do it on the lowered door of your dishwasher. That way, you won’t need to wipe the counter and the door will get washed anyway when you run the dishwasher the next time.

I used my own recipe for the glaze. I sprinkled the top with more cocoa powder and espresso powder to finish.

Coconut White Chocolate Glaze

1 cup white chocolate

1/2 cup coconut milk

2 Tbsp simple syrup (Optional. I used meyer lemon syrup for this one)

Bring everything to a boil, whisking constantly, making sure it doesn’t burn at the bottom. Lower the temperature to a bare simmer and stir until slightly thickened. It will still be pretty runny but will solidify as it cools.

As I wait for the vaccine to do its magic and for me to emerge on the other side with the courage to rejoin public society, I leave you with the gratitude list that I compiled in the first six months of the pandemic. Those who know me know that I am not the “celebration of life” kind of person. Nevertheless, this year has made me appreciate the preciousness of life, the privilege I have, and, yes, the gratitude to which even the biggest cynics can rise.

Positive things about this staying at home and social distancing business:

  1. Basically reverting back to my grad school schedule: roll out of bed before my first meeting, go to bed around 2am. I think this is my natural circadian rhythm.
  2. Appreciating the very rare in-person interactions with others outside my household.
  3. Affirmation that I found the right life partner. Almost six months of spending hours together and we are both still alive and still like each other.
  4. Being clearer about wants v. needs. There is nothing bad about wanting something but I don’t use the word need to justify it anymore.
  5. Being more forgiving of others and of myself. We are all trying to do our best during a pandemic.
  6. Better dental hygiene. I’m not saying it’s poor (my hygienist gives me smiley face stickers for doing a good job) but I pay more attention. If you ever burped in a mask you would know why.
  7. Better work life balance. With the kind of work that I do, I never had enough time to do the things I liked because I could never carve out enough time. Now, I can do both concurrently and it’s awesome.
  8. Buying fruits and vegetables from local farms and feeling totally virtuous about it.
  9. Cooking more. I really missed it.
  10. CSAs and pre-ordering from farms has been the best shopping experience ever.
  11. Drinking good wine on random days. It’s the pandemic; why not?
  12. Empathy for anyone who is restarting. Five years ago this time, I was running 40-45 miles a week training for an ultramarathon (actually fell short of running 40 miles but did a respectable 50k). These days, running 4 miles in one go is excruciating and I am barely making 10 miles a week. But I have pledged to start running regularly again, so here goes nothing.
  13. Finally got over the fear of bread making.
  14. Finally got to take that selfie in Love Park. It’s usually too crowded with people and I am too old to queue.
  15. Finding hacks. My favorite so far is ironing board as standing desk.
  16. Finding new streets and neighborhoods in an attempt to stay away from people.
  17. Freezer surprises, mostly good ones! I have been freezing a lot of leftovers for a long time.
  18. Growing my hair out again. I had long hair for a long time, then after donating 3 feet of hair, kept it short since. It’s legit shoulder-length now.
  19. Less sun means less sun damage means less wrinkles.
  20. Mail order everything because you will be home when the package arrives and there is very little danger of anything walking away with someone.
  21. More time doing strength training exercising.
  22. Much less laundry.
  23. No contact food exchange with neighbors. I have done a version of this before but now it’s one of the joys in life.
  24. No make up! My apologies to all my colleagues who have to look at me but my skin thanks you for having to bear it.
  25. Not exceeding my daily quota of words. It’s a true joy.
  26. Not wearing high heels. Explains the hamstring and calf strain in the first couple of months. It was probably my Achilles tendon stretching back to the proper length.
  27. Noticing little things, like azaleas that are finally in bloom.
  28. Ordering in. I haven’t done that in like 20 years.
  29. Planting again because I have time to tend to a garden.
  30. Purchasing 25lbs of chickpeas sound totally reasonable, if not responsible.
  31. Reading. Actually read an entire book!
  32. Reduced spring allergy symptoms: Not going outside means less time covered in pollen.
  33. Resting an injury. I pulled my left calf muscle a few weeks ago and the general inability to run responsibly has forced me to rest a soft tissue injury.
  34. Showers are not optional, but I can shower when I feel like showering.
  35. Slow mail project: folding and mailing strings of good luck paper cranes.
  36. The mute button during zoom meetings. You know what I mean.
  37. The window sign game is strong in the city. Funny, meaningful, personal, you name it–it’s there.
  38. Unapologetic consumption of garlic.
  39. Using the phone more like a phone.
  40. Using up all the odd stationery I have collected over many years to send cranes. I still have about 100 strings of cranes to send and I may actually run out of stationery first!
  41. Virtual races: At my own time, at my own pace, on my own route, without keeping up with the Joneses, and for causes I care about.
  42. Waking up without an alarm.
  43. Washing vegetables/fruits as soon as I purchase them. Not letting it sit around in its original packaging for days.
  44. Wearing T-shirts all the time.
  45. Written expressions of gratitude (snail mail, texts, email, social media, whatever), since we cannot assume by gestures or contact.
  46. Obvious one: Pajamas as work attire. My dream.
  47. I finally get to use all the soaps and lotions that I have accumulated from hotel stays because I really don’t want to go into stores anymore.
  48. Haven’t blow dried my hair in a week and I think I am getting the shine back.
  49. Not getting dressed up for meetings.
  50. Spending no money on perfume. It is by far the most expensive thing I buy (Givenchy, if you want to know) and I have used it once in the last six months.
  51. Knowing that some things will always be the same. For example, even in a pandemic when days run into each other, Mondays still suck.
  52. Finding time to make 떡 (tteok, Korean rice cakes). It’s not hard to make but it is difficult to make it good, especially the consistency.
  53. Not leaving the house for two, three days at the time doesn’t make me a recluse. I am just being responsible.
  54. Finding a reason to belly laugh every day.
  55. Getting much better doing push ups. I have a rule that if I go downstairs to the basement, I must do 10 push ups before going back up. It is also where the nearest bathroom is…
  56. Watching movies while doing mindless work–can’t really do that in the office without getting side eye.
  57. Ease of getting doctor’s appointment. I was waiting almost 2 years to see a dermatologist and I called last week and the booked me for next week.
  58. Wearing a face mask=not feeling that you just botoxed your face when it’s cold outside.
  59. Finding the time to finally go through the boxes that have been sitting in your office since I moved into the house 10 years ago.
  60. The weight gain over the last 8 months turned me into a frickin’ camel; didn’t need food or water running a half marathon distance.
Baking

Mini’eesh

The first bread that I learned how to make with fairly reliable consistency is mana’eesh. Mana’eesh is a Lebanese flatbread with za’atar. Mana’eesh (or sometimes manakish) is the plural term. Mana’oushe is the singular term.

Each time the dude’s parents visit the United States, they bring a kilo or two of freshly made za’atar from the best vendor in Beirut. She would make sure that the za’atar is fresh, as in it was made within the week or their travel date. Once in the US, she would bake mana’eesh and wrap them individually in foil so that it could be frozen then thawed/rebaked in the oven. The entire house will be filled with the aroma of warm bread and herby goodness and linger afterward for several hours. It is the smell of warmth.

The dude doesn’t speak much about his early childhood in Lebanon. Like so many families, they left suddenly during the war in the 1970s. From what I remember about my Lebanese friends in Ghana whose family escaped their homeland (if not at the time, in the proceeding few years), while they themselves remembered little and some were born in Ghana and held Ghanaian citizenship, the feeling of displacement was indelibly linked with their identities. When the war was over, they went to visit family each summer and speak hopefully about the time they would go home. Some did; many did not. The dude never returned.

For that reason, I was surprised that he voluntarily mentioned the happiness of smelling fresh mana’eesh in a nearby bakery, one of the few memories he had of his childhood in Beirut. It explained his excitement every time his mom made it for him and it made me sad that the leftover za’atar sat in the pantry, unused for months. Also, since his mom always made mana’eesh in their apartment and never on site, I had no idea what that smell was, whether it was same or different from the reheated version.

So, I decided to give it a go at making mana’eesh myself.

Mind you, at the time, I had just gotten over my fear of baking with yeast (focaccia turning into a frisbee will get you off breadmaking for a while), and the only other dough I had made successfully was pizza. Since I am gluten free, I had no idea of gauging success by eating and tasting. With pizza, at least I know what it’s supposed to look, smell, and taste like and I remember the mouthfeel of the dough. Luckily, the dude enthusiastically agreed to eat through all the experiments.

First stop in learning how to make something was his mom. But like most moms who have been making something for a long time, it was difficult for her to actually explain what to do and nothing came with measurements. And, like me, she doesn’t like company in the kitchen so I didn’t press the issue. I tried several recipes with varying success. Finally, I found the one that I use consistently, which is Yotam Ottolenghi’s recipe I stumbled upon. This is one that I also received a thumbs up from his dad.

There are a few notes to this recipe, based on my experience:

  • No yogurt. It’s not how the dude remembers and it’s not how his mom makes it. Just the za’atar/olive oil paste.
  • Instead of caster sugar, I used 1 Tbsp of honey. So the yeast mixture is 300ml filtered water, 1 Tbsp honey, 2 tsp dry yeast.
  • The olive oil in the recipe is not divided up (pet peeve in recipes). Most of the oil in the recipe is for the za’atar paste save for 2 Tbsp. The dough is as follows: 4 cups bread flour, 2 tsp sea salt, 2 Tbsp olive oil, and yeast water mixture. I measure everything by volume and not weight. The breadmaking purists would say that volume is too much of an approximation; I am just too lazy to bring out the kitchen scale.
  • I often replace up to half the bread flour with whole wheat flour. The dough will not be not as stretchy and chewy and bubbly but it does have more nutrients.
  • The promised land for the right dough is when it bubbles up with air pockets, sometimes as big as a ping pong ball. To get this consistency, I found that there are 3 things that should be done: 1. Knead it for 10-15 minutes until smooth; 2. The dough should feel slightly moist and sticky on the hands without actually sticking; and 3. After the initial rise and after dividing the dough, let it sit for a bit for until it’s pliable before rolling it out. I don’t have a commercial oven and baking pans large enough to bake all 12 breads at once. Also, I don’t like to bake more than one pan at a time. What ends up happening is that the there will be some inconsistencies in the final result based on how long the dough has rested after the initial rise and the middle half will be more bubby than the first and last pans.
  • Roll out the dough pretty thin, more than 1/8 but thinner than 1/4 inch. I found that stretching the dough first and rolling out the dough quickly helps with the bubble formation.
  • Most recipes have a shmear of the za’atar/olive oil paste. I often use close to half a pound with each batch. This is an individual preference because the za’atar has a very strong smell and taste. The dude is of the opinion that za’atar on dog turd would taste good so I coat the dough with the mixture like I would coat pizza dough with tomato sauce.
  • I have the oven temperature to 400F from beginning to end. Because I bake two at a time, I can’t really heat up the pan each time and reduce the temperature. It works just fine.

Even now, some days produce better bread than other days. I make it roughly once every 7-10 days because this is the dude’s favorite bread so I get a lot of practice. The process, from beginning to end, takes about 3 hours.

Finally, just in case you are wandering, “Mini’eesh” is not a typo. This recipe is supposed to make mana’eesh that are about 7-8 inches and some bakeries have them as big as 12 inches wide. I have yet to learn how to cut the dough properly so that they are roughly the same size. One time, about half of them came out to be less than 5 inches in diameter so I labeled them “Mini’eesh” in the freezer bag. We all had a good laugh and the name stuck.

Steaming

Yaksik/약식

It’s probably one of my favorite Korean food. It’s technically 떡/rice cake but it us made of whole rice instead of rice flour or pounded rice. It’s full of nuts and dried fruit and sweet and savory. It looks impressive when made but all it takes is some prep work and a rice cooker. It freezes well too, and 15 seconds in the microwave and it’s tastes like fresh made (Almost. Let’s be honest: nothing ever tastes like fresh made food). The literal translation is “medicine food” and it’s traditionally eaten on the first full moon after Lunar New Year/정월대보름. I eat it whenever.

I started making yaksik several years ago because I really craved it. After browsing through several recipes online, I settled on this one by Crazy Korean Kitchen, which looked like the most straightforward. The first time I made it, I ran into ingredient problems. First of all, I didn’t have any chestnuts. I usually keep a stash of boiled chestnut snack bags somewhere but there was none in sight. Also, I really, really, dislike dried jujubes. It looks like a petrified red bug, has the mouth feel of tree bark, and tastes sweet and medicine-y. At least to me. If you assume it’s going to be like medjool dates just because it is called Korean dates, you are going to be very disappointed. When I was a kid, my mom would smuggle a small bag of this stuff and keep in the freezer for special occasion foods and I will religiously pick each bit out before eating said food.

So what do I do when I hit an impasse with a Korean recipe? Call Mom of course. Making Korean food in Ghana meant improvising everything if the ingredient wasn’t brought in our suitcases on our last trip to Korea. If there is someone who had an out-of-the-box solution, it would be Mom. Basically, this is what she said: What goes in it isn’t that important. Whatever dried fruits and nuts I had on hand was totally fine. She even put cubed kabocha squash instead of the chestnuts and it was totally fine. Also, plain water instead of boiled jujube water would work although the flavor would not be ask complex. After many iterations of making yaksik, I have a few guidelines.

Sonya’s Pro-Tips

  • Soaking the rice is super important. This actually makes of breaks the end product. Overnight in the fridge is best.
  • I discovered dried chestnuts in the Asian grocery store near the house. Right at the beginning of the pandemic, I bought out all the packets of dried chestnuts. make sure to soak it with the rice if using dried chestnuts. Even then, it could be hard so cut it into small pieces so that it cooks through in the rice cooker.
  • The boiled chestnut snacks, also widely available in Asian grocery stores are great because you don’t have to worry about texture. Obviously, don’t soak these.
  • The rice to liquid ratio has to be precise. I actually measure this carefully.
  • Traditionally, it’s all honey but using dark brown sugar adds more color. I go 50/50 for the most part.
  • Pine nuts are a must for me. Somehow, it doesn’t taste right without it.
  • Whatever amount of nuts and dried fruit that the recipe suggests ignore it. 2 Tbsp of raisins? Really? I put in like a cup of mixed raw nuts, a cup of mixed dried fruit, and about 1/2 cup of sunflower seeds and pepitas. Just make sure they are roughly even in size and there aren’t clumps or gigantic pieces of something.
  • The nuts and fruit must stay on top so that the rice cooks evenly. Don’t worry–it will get mixed in there evenly eventually.
  • Wait to open the lid. It says 5 minutes in the recipe but I would say at least 15 minutes. The Korean expressions is “뜸드린다” and it is an expression used when someone keeps hesitating and implying something without saying or doing it outright. You will feel the exact same kind of frustration but this step is totally necessary to make sure the rice is cooked properly.
  • Using plain water is so boring so I steep things other than jujubes to provide depth. My go to is ginger and dried persimmons. I like ginger and dried apricots too. I like adding the ginger because it balances out some of the sweetness. Straight up dried persimmons or dried apricots work too.
  • I have never doubled this recipe before because my rice cooker is not big enough. It’s the same Black and Decker rice cooker I bought at the CVS when I was a grad student. It’s got a dent but still works!

When I am organized, I make a couple of batches and share it with friends, colleagues, students, neighbors, and a couple of Korean business owners in my neighborhood. One of them was the shoe repair guy. He is around my dad’s age and repaired my shoes for many years. When he moved location, I tracked him down. We would have short pleasantries in Korean. One time, around Lunar New Year, I dropped off a small loaf pan of yaksik on my way to work. The next time I went to drop off some shoes, we had a long chit chat. He said his wife makes everything well except for yaksik and it was his favorite food. He hadn’t had good homemade yaksik in many years so it was a treat for him. Since then, we would chat until the next customer came in. I met his wife when she retired. She would spend time in the shop with him, probably a little bored, so I was always a welcome visitor. I found that they were almost exactly the same age as my parents. They spoke of the culture shock they experienced when they went back to Korea for a visit after many years in the US. We laughed at how sometimes we would pretend to not speak Korean because we were treated differently, like foreigners. She loved my yaksik too. He finally retired when COVID closed the doors of many small businesses. I never got to say happy retirement to him but I am sure his wife is glad to have him at home.

Fruit

Pomegranates

Pomegranates are a low ROI fruit for me. It’s delicious, it’s nutritious, it’s pretty, and the sweet and tangy bursts of flavor is a party in your mouth.

Selecting a good pomegranate involves careful consideration of color (bright red), skin texture (slightly leathery exterior without it looking completely dried out means it’s just right), heavier in the hand than it looks (I gently toss it a few times to feel the full weight of the fruit), and big (about the size of a softball). Apparently, it is also a secret weapon for beauty (The box featured here is a gift from Mom in the last care package she mailed me. It’s pomegranate concentrate made into jelly and individually packaged for easy transport and eating.).

The problem is that the time it takes for me to seed a pomegranate is more time spent than the time it takes for it to disappear. There is a Pomegranate Monster living in the house and they have an uncanny ability to gobble up every last seed before I get to have one spoonful.

There are many different ways to seed a pomegranate but this the method I use:

  1. Score around the top (the part where there is a small tube-like protrusion)
  2. Score the skin from top to bottom, about 5-7 scores, so that there are about 6-8 wedges
  3. Fill a deep bowl with cold water, enough to submerge the pomegranates
  4. Under water, pull apart the pomegranates at the scores
  5. Seed the pomegranates by sliding them off the skins with your thumb (they should pop right off).
  6. Toss the skins as you finish each wedge and rub off any white pith gently. The seeds will sink to the bottom and the pith will float to the top.
  7. Scoop up the seeds from the bottom with your hands. I found this to be the best way to make sure to get rid of any errant piths.
  8. Drain the seeds in a colander. Once drained (some water is okay) transfer into container and refrigerate. It takes about 10-15 minutes for each large pomegranate but at least the kitchen doesn’t look like a murder scene like it did the one time I tried to seed it on the counter.
A large colander of four seeded pomegranates.

There is also the “whack it with a wooden spoon” method but I had to stop doing that because inevitably, I would whack my left thumb with the wooden spoon. (This is probably why sports that involved a racket or stick never worked out for me.)

The Pomegranate Monster is the dude. He loves pomegranate. He speaks fondly about childhood memories of a bowl of pomegranate with a spoon in it for him after school. Once he spies the container of ruby red jewels and gets access to a spoon, it’s gone. I can’t eat too many at one time on account of the piths accumulating between my teeth. I have tried hiding my share occasionally but the Pomegranate Monster seems to know how to sniff them out, even when they are on the bottom shelf of the fridge. So I resign myself to savoring a few spoonfuls when I can and leave the rest to be hoovered up shortly.

I do this out of love.

Cooking, Uncategorized

Contemplation over Hummus

On St. Patrick’s Day, I stood at the white quartz counter of my Philly rowhome, listening to K-Pop and peeling boiled chickpeas to make hummus. Today’s Spotify selections seem to be mostly ballads, resonating with the mood of the day marked by the murder of eight people in Atlanta, what I am certain is a hate crime against people of Asian descent. Friends checked in on social media and with text messages as the spin of the news pointed to possible motivations for the killings.

Chickpea peels

There is a lot of debate about whether or not it is necessary to peel chickpeas, especially if you use a high-powered blender (which I do), or if you can even tell the difference. I choose to painstakingly pick off the skin of each chickpea to make the five cups I need for the hummus. The whole process takes about an hour or so. The mostly mindless and repetitive exercise gives me time to think through stuff without interruption.

I think about the fact that it is the middle of the day on a Wednesday. I am working from home and there are no meetings scheduled all day so that means that I can parse out my work for the day in whatever fashion I want. I have just come back from a five mile run through the South Philly and Pennsport neighborhoods, mostly on empty streets save for the dog walkers and construction workers. I think about the fact that the women killed yesterday did not have my privilege and had to report to work that day because their livelihood depended on being out in public in the middle of the pandemic. I wonder if I have the right to feel that I am a target.

As the peeled chickpeas start to pile up in the bowl, I think about whether or not spending this time is foolish. I did make hummus once before without peeling and the texture was definitely grittier than when I started peeling them. I wondered if that was because I did not use enough tahini or because I did not blend it enough, or it was really because of the peels. The dude told me that for hummus they must be peeled–that’s how it is done in Lebanon. Now that I have done it a few times and know the exquisite smoothness in texture, I cannot ever not peel the chickpeas. I think about the environment in which I grew up and the international school that shaped my worldview. A school of barely 1,200 children from kindergarten to Upper Sixth made up of 48 different nationalities, where difference was all around us all the time so that it was normal. I know that it was a privilege afforded to me as a foreigner living in Ghana to attend an elite, private school and that the school shielded me from harsher realities of poverty and oppression. However, it did teach me, from a very early age, that people you call your family are not necessarily related by blood and friends are not only people who look like me. The corollary goes for enemies. Once you know something good, you can never go back. I am the beneficiary of a diverse and inclusive space and I want to find a way to reclaim it but I no longer know how.

I think about my own identity now. I have always been an outsider of sorts. I was never Korean enough for my Korean extended family and often treated like a weirdo on my summer visits to Korea (I stopped going when I turned 16). I was never Ghanaian enough because people in the streets never let me forget that I was a foreigner. When I came to the United States for college, I couldn’t pass as Asian American until I learned to speak with an American accent (“leisure” was the last word I unlearned–“rhymes with seizure not pleasure”). Then, I learned through experience and an entire dissertation, that even people born in this country are often treated like outsiders and foreigners. I thought I had settled happily in my inbetween space as a perpetual outsider. That space is no longer safe.

I think about my role as an administrator in higher education where there is an overrepresentation of students of Asian descent (although not necessarily in faculty or administration) and from the ivory tower, we are not always viewed as people of color or minority–until something like this happens. I think about how after 9/11, many of my friends had to get their fingerprints taken because of their nationality, there was a spike in violence against Sikhs for wearing turbans and growing beards, and all my friends with the name “Omar” (I know a surprising number of people named Omar) got searched at airports. Violence against people of color has always been present; it’s just that violence against people who look like me was highlighted most recently. A friend once told me that rather than engage in “Oppression Olympics” we should find a way to address the structure that perpetuates oppression. I am still looking and trying but every one of these murders reminds me how far we, as a society, have left to go.

I think about the fact that I add lemon zest in my hummus to enhance the lemoniness even though no traditional recipe I have seen includes lemon zest. I think about all the different “hummus” out there made out of all sorts of different beans and flavors and wonder if they know that “hummus” or “hommus” means chickpeas in Arabic. I wonder when hummus became ubiquitous in American cuisine since I remember a time when it was a specialty food item. I think about how much I hate the idea of authenticity although I catch myself looking for the “real deal” often. I think about the oppression of binary gender norms of a narrow-minded society and the recent deaths of LGBTQ activists in Korea. I know that violence does not always have to involve a gun. I wonder when the time will come when labels lose meaning and change and difference will be ubiquitous.

Sonya’s Hummus Recipe

  • 4-5 lemons, juiced and zested
  • 8-10 cloves of garlic
  • 1.5 cups water
  • 2-3 Tbsp kosher salt
  • 5 cups chickpeas, boiled and peeled
  • 2-2.5 cups tahini
  1. Blend lemon juice, lemon zest, garlic, water, and salt.
  2. Add chickpeas and tahini.
  3. Blend until smooth, scraping the sides as necessary.
  4. Refrigerate. Makes about 6 cups of hummus.
Six cups of super creamy hummus

The dude tasted a fingerful of hummus and the verdict was “Lemony, garlicky, tahini-y, chickpea-y but needs more salt. Eh! That can be added later.” I wonder when we can be hummus.

Cooking

To cook or not cook chicken

As a rule, I don’t cook raw chicken at home. There is one exception to that rule: If it’s chicken soup it’s okay.

The fear of cooking raw chicken is a bit irrational, I know. I love chicken. One of the things I miss most when I became GF was deep fried chicken with crunchy skin that can only be achieved through dredging it with seasoned flour. [commence Homer Simpson drooling sounds.] Chicken can be a neutral vessel for any sauce but has it’s own distinctive taste and smell. What is there not to like about chicken? Nevertheless, the fear has persisted, even through some of my leanest days where chicken thighs were the most affordable protein available on my $1k a month income.

The few occasions I have cooked chicken at home, it involved disinfecting the entire kitchen area right afterwards and scrubbing my hands raw. I know where the fear originated. I read somewhere, a long time ago, that the liquid from packed chicken carry salmonella and because you can’t see where the droplets end up on the counter it could contaminate other foods. I hate food poisoning. Okay, no one likes food poisoning, I get it, but I know this was the start of it all.

Chicken soup is different, especially when making it in a slow cooker or pressure cooker. Minimal touching, no cutting of the meat, and you can press a button and it’s all done!

Sonya’s Magic Chicken Soup

This name was gifted to me by a friend. He had heart surgery and I made pots of this soup for him during his recovery. Of course, the turmeric was left out (it’s a blood thinner).

Ingredients:

  • 1/4 olive oil
  • 3 lbs of chicken, skin on and bone in, always. That’s where all the good flavor is.
  • 1-2 large onions, chopped
  • 1 bulb of garlic, each clove cut in half (make sure to discard the sprouts if it’s older)
  • Equal amount of ginger to garlic, julienned
  • 1-2 lemons, zested, then cut in half/quartered.
  • 1-2 bay leaves
  • A good amount of turmeric powder or equal amount of turmeric root to ginger/garlic, julienned
  • 1-2 Tbsp kosher salt
  • Herbs and spices to taste
  • Water to cover

Method:

  1. Heat the oil in pan or directly in the pressure cooker if it has a “Sauté” option. Sear the chicken until it’s translucent. It won’t be cooked through.
  2. Squeeze lemon juice over chicken and throw in the rinds. Add all other ingredients on top of the chicken.
  3. Add water so that the ingredients are covered by about 2 inches of water at least.
  4. Cover and cook until meat falls off the bones. For a slow cooker, it’s on “High” for 10 hours. In a pressure cooker, it’s “Soup” for 37 minutes.
  5. While the soup is cooking, disinfect all surfaces–pretty much anywhere chicken juice may have landed.
  6. Once the cooking is done, discard chicken skin and bones, bay leaves, and lemon.
  7. Season to taste.

Other additions/options:

  • Add a whole habanero pepper for a spicy version.
  • Fresh lemongrass, if you can find it, perks up the soup.
  • Korean pear, peeled and chopped. It will dissolve in the broth. Not Asian pear; Korean pear.
  • If you have dried mushrooms on hand (dried shiitakes are a pantry staple for me), you can steep the mushrooms in boiling water and use the mushroom water as some of the liquid. Alternatively, you can add dried mushrooms into the pot with the other stuff and have it reconstituted while cooking.
  • You can take out all the meat and bay leaves (also any twigs from fresh herbs or lemongrass) then use an immersion blender to blend the broth with the lemon. Add shredded chicken after blending. It makes a thicker and lemonier soup.
  • I generally don’t like too much other stuff in my chicken soup, but diced carrots, celery, fennel, potatoes. etc. should all work.

Uncategorized

Pickled Garlic Scapes/마늘쫑

One of the joys (and sometimes frustrations) of joining a CSA (Community Supported Agriculture) is that you get whatever is in season. Around late spring of 2020, I joined the Savoie Organic Farm CSA. When I used to shop regularly at the Headhouse Farmers Market, I shopped with them mostly to get pepper seedlings (I still have fond memories of purchasing Trinidad Scorpion seedlings from them several years ago). Late May, I started getting boatloads of garlic scapes. Garlic scapes are the stalks that grow from the bulbs of garlic plants. I love them but I could not use them quickly enough in stir fries and they started to accumulate in the fridge.

Then I remembered that one of my favorite 반찬 (banchan or side dishes) was 마늘장아찌 (pickled garlic scapes) but not the kind that is served in most restaurants that are cooked in soy sauce but ones that were peppery and chewy and crunchy at the same time. I did a few google searches and none of them were what I remembered.

So I called Mom.

She, too, started with the soy sauce version:

  1. Sterilize jars and fill with scapes.
  2. Combine 2 cups sugar, 2 cups vinegar, 2 cups soy sauce, and 1 cup water and bring to a boil.
  3. Pour hot liquid over the scapes.
  4. Let cool completely and store it in the fridge for 3-5 days.
  5. Once ripened, fish out the scapes, add 1 Tbsp gochujang, 1 tsp sesame seeds, 1 tsp simple syrup, 1 tsp sesame oil, and mix.

I said that was not what I remembered. She paused for a second, then asked, “How much gochujang do you have?” I happened to have a lot. Then came the simplest instructions ever: “Cut the scapes to about 3cm and bury it in the gochujang and let it sit for a few weeks. You can fish out what you want to eat, add sesame oil, sesame seed, and rice wine vinegar, and that’s it. You can use the garlicky gochujang for making banchan or soup.” (Turns out that the pickle I was looking for is 마늘쫑 and not 마늘장아찌).

3 weeks worth of garlic scapes about to be buried in 4 lbs of gochujang

“This is your 외할머니’s (maternal grandmother, so my mom’s mom) method. She knew I liked this so every spring she would bury the garlic scapes in the gochujang 장독 (jang dok, earthenware pot that is specially made for fermenting sauces) so that they would be ready when we came to visit in the summer.”

Her voice broke a little.

Out of her four sons and four daughters, my mom was closest to my grandmother. She also lived furthest away, in Ghana. Back in the 80’s the journey from Ghana to Korea was Accra-Lagos-Amsterdam-Anchorage-Tokyo-Seoul and the reverse to get back so it took several days to travel back and forth. We tried to go to Korea every summer if possible. In the time of snail mail and $2 per minute phone calls, keeping in touch with family half way around the globe was not easy. This was my grandmother’s way of thinking of her daughter and waiting for her to come home.

My grandmother passed away very suddenly while my mother was in Ghana and it devastated her. She still tears up when she speaks of her. This is the first recipe that has been handed down from my grandmother to my mother to me.